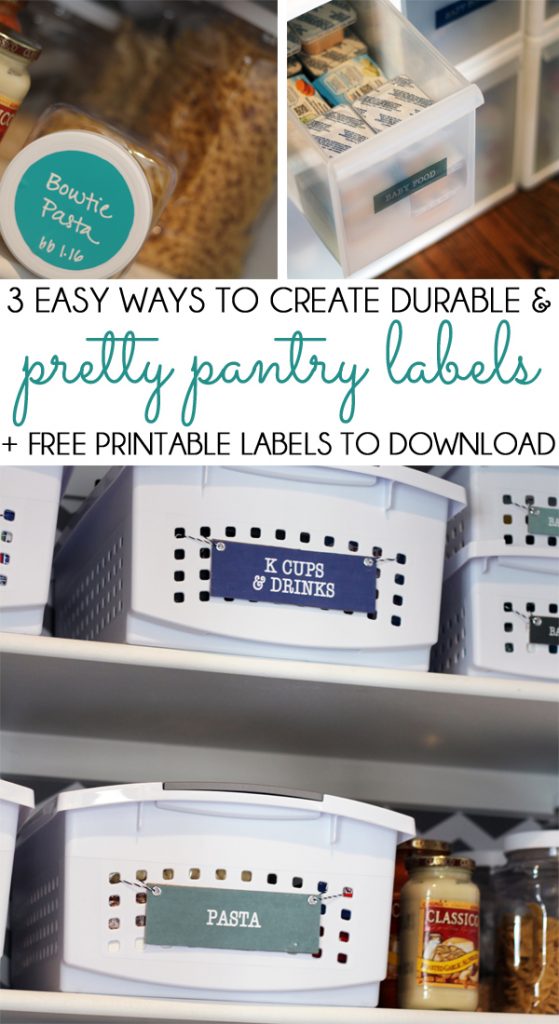
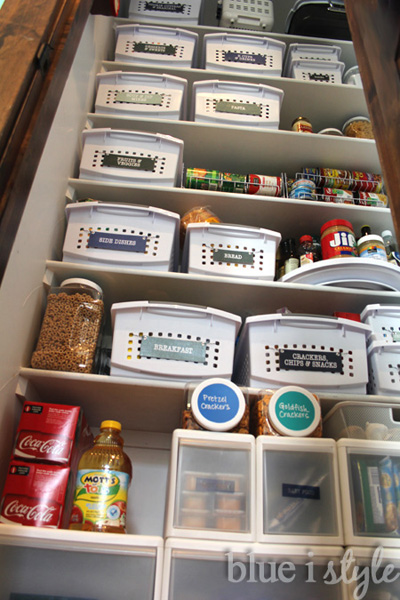
Without labels, our pantry would just be a sea of matching white bins. I would have a pretty good idea of what goes where, since I organized it to start with, but imagine my poor kids and husband! They would never be able to find things, and certainly wouldn’t be able to help put groceries away without things quickly becoming a disorganized mess!
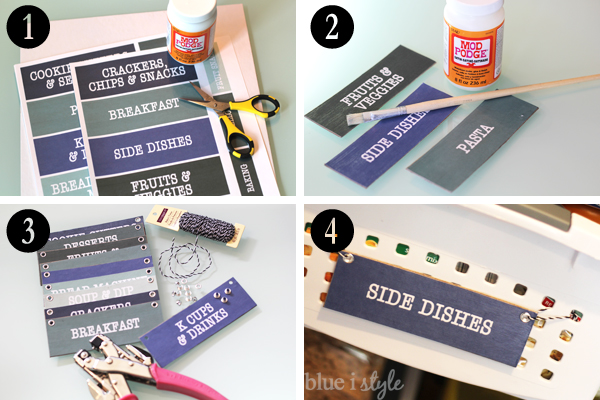
(1) I printed my labels on to card stock and cut them out;
(2) I glued each label to thin, medium weight chipboard {left over from creating my paint and fabric swatch kit} and trimmed the chipboard down to the same size as the labels before sealing each label with a coat of Mod Podge {over the top, back and sides of the labels};
(3) I inserted an small silver eyelet in the top corners of the labels using my Cropadile eyelet setter; and
(4) I then used black and white baker’s twine to tie each label onto my baskets.
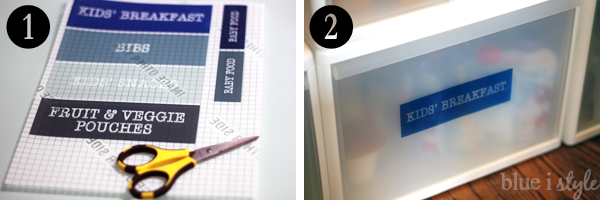
It only took one of the ten decal sheets in the package to label all of my drawers, leaving me with nine more sheets for the future {and I plan to use some of those extra sheets to help my boys make holiday decorations for our windows}. By using window decals to label the drawer fronts, I am assured that the labels will stay firmly in place until I choose to remove them, but will be easy to remove when the time comes.
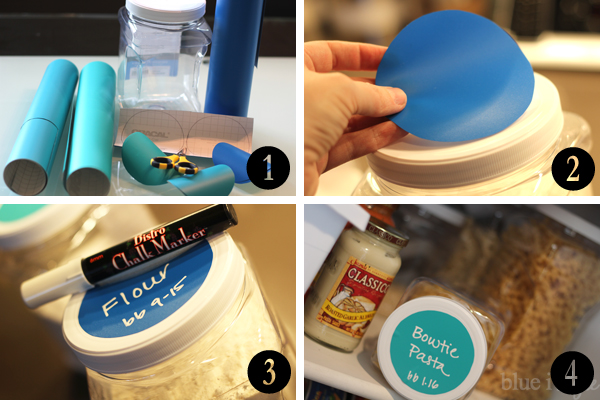
CANISTER LABELS. I addition to the baskets and drawers, I also used quite a few plastic screw top canisters in my pantry organization. When filling these canisters, I discarded the original packaging, but I wanted to retain the important information {like best by dates}. Since the contents of these canisters will change frequently as we use up items and purchase refills, I needed the canister labels to be very easy to updated.
Since the canisters will need to be washed from time to time, I opted to label the lids rather than the fronts of the containers. This way the canisters can be popped in the dishwasher, and the lids can be quickly wiped down. To create these canister labels:
(1) I used some colorful adhesive backed vinyl, which can be purchased at any craft store {mine was left over from prior projects {like this one, and this one, and this one};
(2) I cut traced circles on the backing of the vinyl, cut them out, and stuck them to the top of the canisters;
(3) Then I used a chalk marker to label the contents and the “best by” date.
(4) The chalk marker quickly wipes away with a damp cloth, and the labels are then ready to be marked with the new contents and date.
FREE PRINTABLE PANTRY LABELS! Are you ready to get your pantry organized with some pretty labels? To get you started, you can download the labels that I used for our pantry baskets! Happy organizing!
