This is a sponsored post written by me on behalf of Cricut. All opinions are 100% mine.
Cricut has long been established as the ultimate crafting tool! And while I get my craft on from time to time, I’ve always used my Cricut cutting machine primarily for organizing.
While I love my Cricut Explore Air (and am coveting a Cricut Maker for it’s ability to cut even more materials), the truth is that both machines are much more powerful than what I need for the majority of my projects. I love showing you all the ways that I create labels with my Cricut, but I know that for my organizing-loving readers, the idea of buying a large Cricut machine just to make pretty labels is both a bit intimidating, as well as potentially cost prohibitive.
That’s why I’m so excited about the newest addition to the Cricut family! Cricut sent me the new machine to check out, and it was love at first sight! The adorably mini Cricut Joy is perfect for organizing, and so much more!
This post contains affiliate links. If you purchase something I recommend, you’ll pay the same price, but I may receive a small commission.
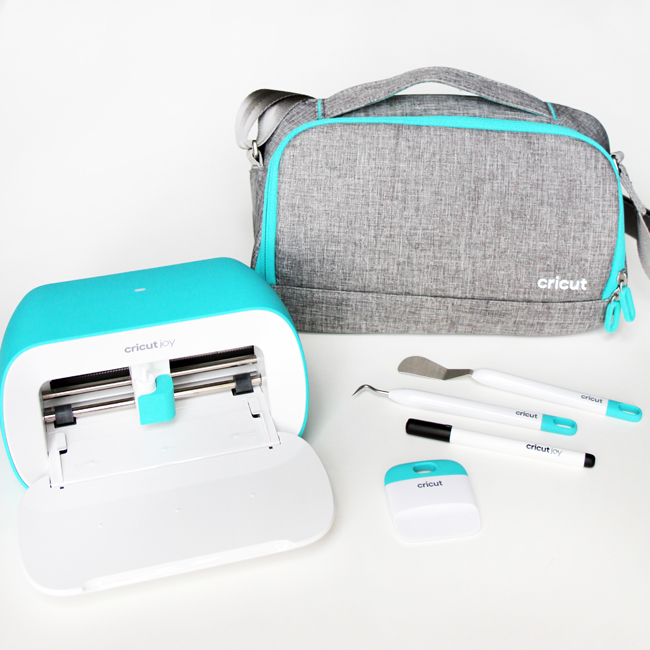
This machine is the perfect mix of function and practicality! It’s powerful enough to create all of organizing and labeling projects that I’ve shared on the blog over the years, but it’s small enough to store anywhere (no craft room required) and the learning curve is almost non-existent!
Especially for organizing-lovers and moms, Cricut Joy is the perfect machine:
- Cut adhesive vinyl labels
- Write and cut labels for basket and bin label holders
- Create custom birthday and greeting cards in minutes
- Make custom t-shirts, tote bags, and backpacks with iron-on and infusible ink
Ok, so what if you already own a Cricut Explore or Maker – do you also need a Cricut Joy? That really depends on the types of projects you make, but for me, the answer is a resounding yes! Because of it’s small size and ease of use, it’s the perfect companion machine that I can move around the house as I work on my organizing projects. But it’s more than just that – Cricut Joy also has some great benefits over my large Explore Air machine:
- Cut vinyl without a mat
- Cut unique phrases up to 4 feet long (no longer limited by a 24″ mat)
- Cut repeating patterns or letters up to 20 feet long!
I do a lot of organizing for clients, and many request pretty, custom labels like those I make for my own home. Now I can tuck my little Cricut Joy into its carry case and take it with me to my clients’ houses. It’s small size, the ability to design and cut via Bluetooth connection, create long cuts without a mat makes the Cricut Joy a must have for professional organizers!
Five Creative Ways to Make Labels With Cricut Joy
As soon as I unboxed my Cricut Joy, the first thing I wanted to do to test it out was make some labels!
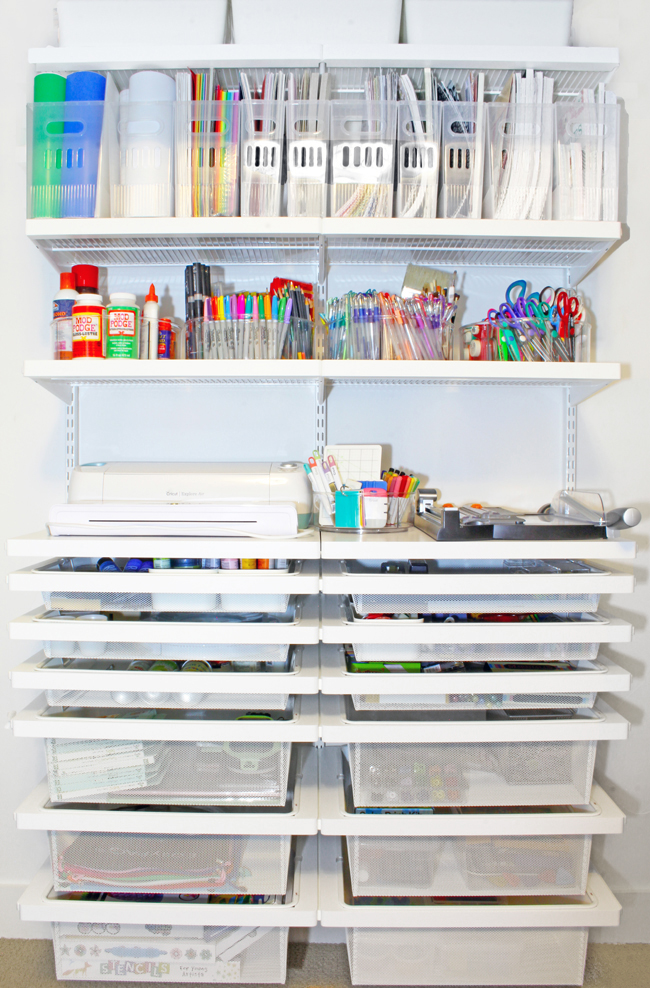
Last fall, I installed a new closet system in my craft room, and it’s pretty much all my organized dreams come true! But I hadn’t yet completed the very important final step in the organizing process – adding labels! I knew the closet would be the perfect spot to test out my Cricut Joy by creating a few different styles of labels for each of the bins, drawers, and containers.
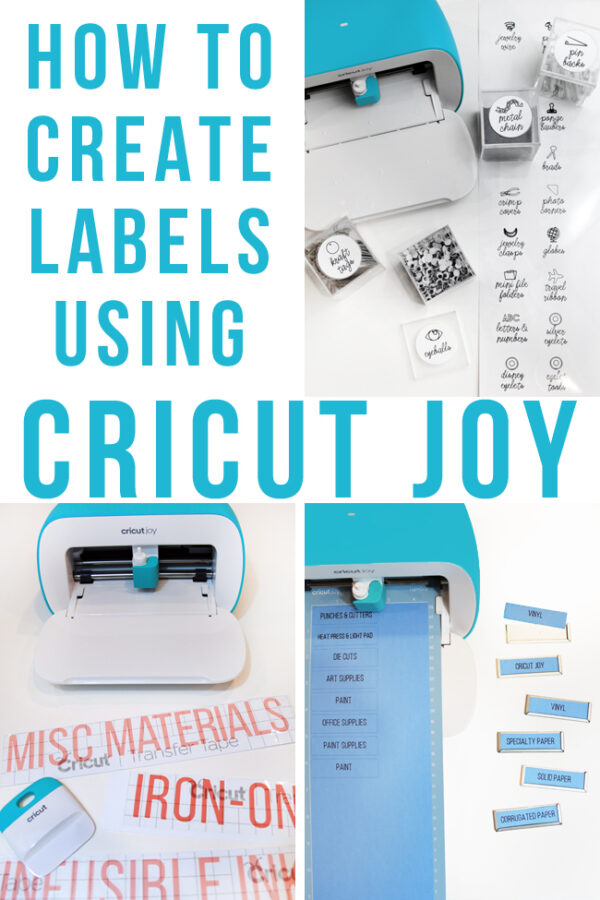
I used adhesive vinyl to cut out words to label the bins on the top shelf, I created cardstock labels to perfectly fit the label holders I purchased for each of the drawers, and I designed custom stickers to label all of my small craft supplies. I’ll show you, step-by-step, how to design and make each type of label, and I’ll share a few more ideas to organize your home using Cricut Joy.
1. How to Label Bins Using Smart Vinyl
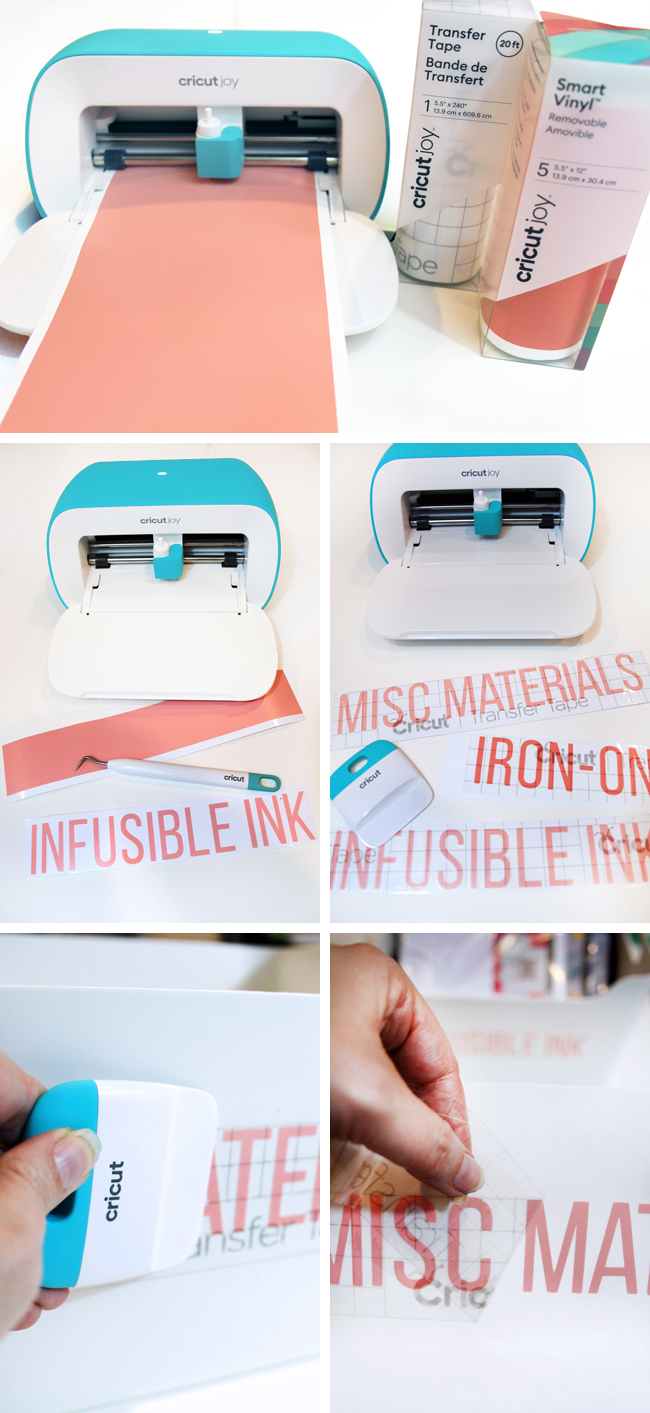
Cutting words out of adhesive vinyl is one of my favorite ways to label all around my house – including on the drawers under my kitchen sink and in my travel closet, and on the lazy Susans under my bathroom sink. Thanks to Cricut’s new Smart Vinyl designed exclusively for use with Cricut Joy, I can now create these impactful vinyl labels by feeding a roll of vinyl directly into the machine without using a mat.
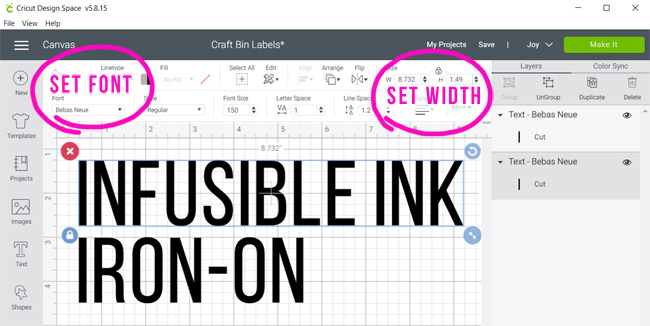
Start by opening Cricut Design Space and use the text tool to type in the words that you want to cut. All you need to do is choose a font, and then set the size. You can set the font size, just like you would in any other program, but I prefer to set the size using the width and height measurements.
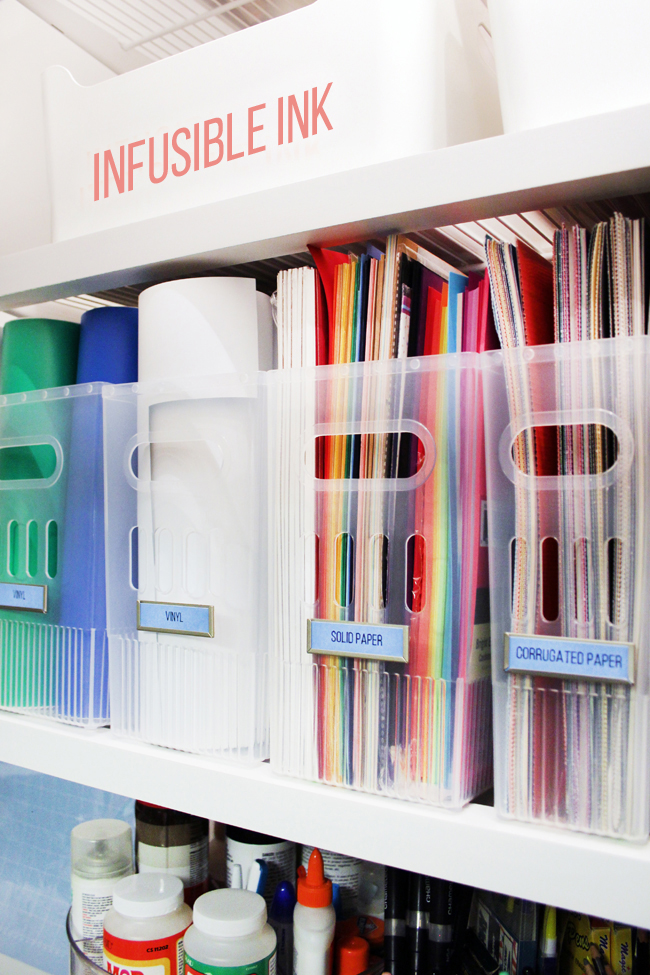
The bins on the top shelf of my craft closet are 13″ wide, so I set my longest label (“Infusible Ink”) to about 8.75″ long. I then noted the corresponding font size and used that same font size for my remaining labels.
It took me less than a minute in Design Space to type in the words I wanted to cut. After designing your labels, click “Make It,” and select “Without Mat” to cut using a roll of Cricut Smart Vinyl.
Of course, if you already own regular vinyl that you want to use, you could cut it to fit the Cricut Joy mat and load the machine that way instead.
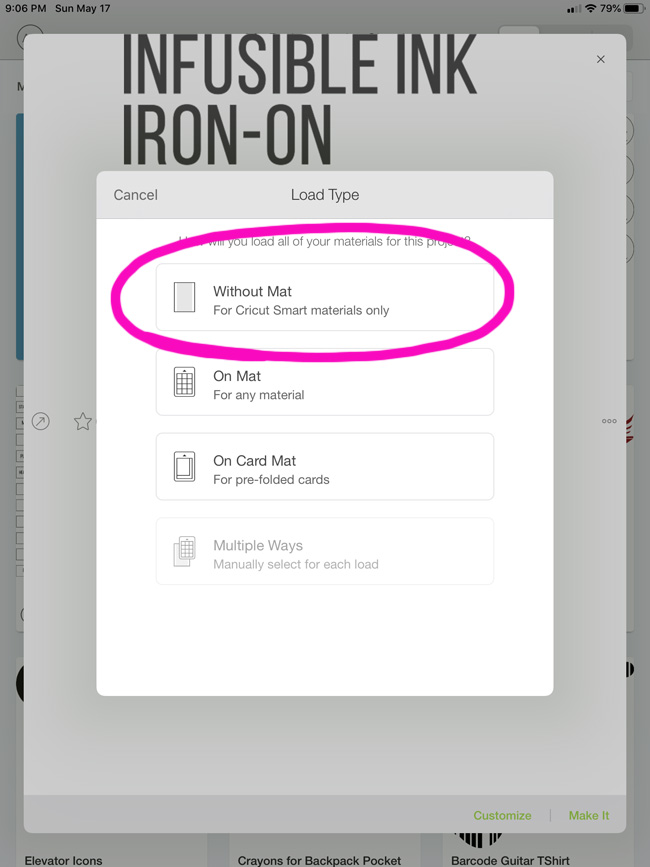
Here are the simple, step-by-step instructions:
- Click “Make It” in Cricut Design Space.
- Select “Without Mat” and choose “Smart Vinyl” as the material type.
- Load a roll of Smart Vinyl into the Cricut Joy by feeding the end of the roll into the machine with both hands until the rollers grip the material. The machine will pull the vinyl through the machine to measure that the material is long enough for the selected design.
- If it’s not already in place, insert your blade into the machine housing.
- Select “Go” to begin your cut.
- When the cut is complete, click “Unload Mat” in Design Space.
- Use scissors or a paper cutter to cut each word apart, then peel off the excess vinyl around the words. Use a weeding tool to remove the vinyl pieces from the inside of letters.
- Apply a layer of Cricut Joy Transfer Tape over each of the vinyl labels and burnish (rub) with a scraper tool to ensure the transfer tape sticks to the vinyl.
- Turn the labels over, and carefully remove the vinyl backing sheet, leaving the letters stuck to the transfer tape.
- Center a label on your bin, and use a scraping tool to apply pressure to ensure the label is firmly adhered to the bin.
- Carefully peel off the transfer tape at a 45 degree angle.
These bold, graphic labels are perfect for the bins at the top of my craft closet, making it easy for me to know the contents of each bin at a glance!
2. How to Create Custom Stickers Using Smart Label Writable Vinyl
As much as I love creating simple, cut out word labels using adhesive vinyl, I was intrigued by the new Cricut Joy Smart Label Writable Vinyl and was excited to try it out.
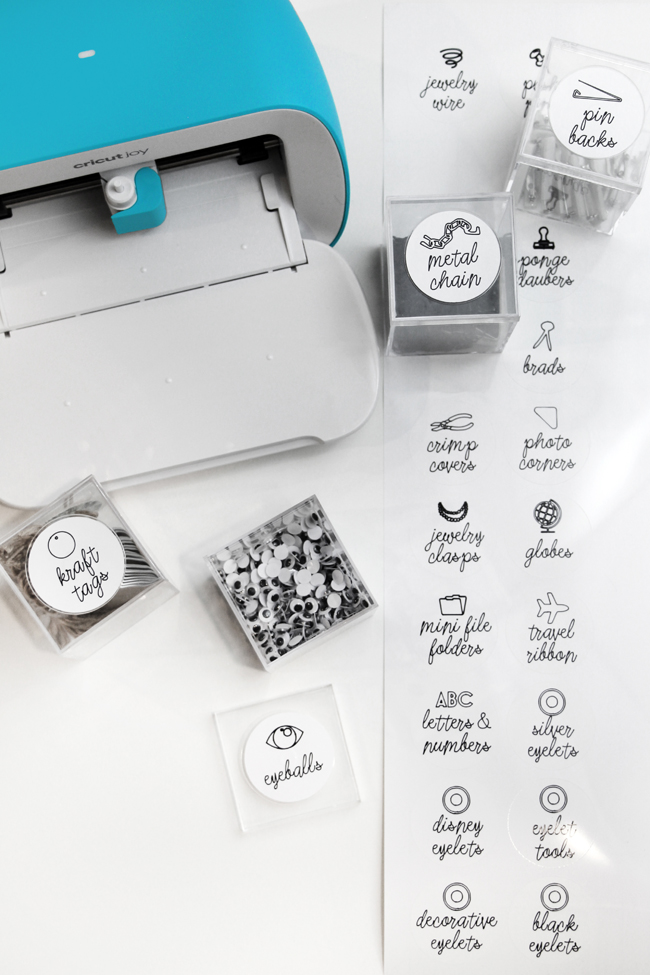
I have all of my small craft supplies and office supplies organized into small, square, lidded boxes. To label the lid of each of these clear containers, I designed round stickers in Design Space and used Cricut Joy to write the words and draw the icons, and then cut a circle around each label.
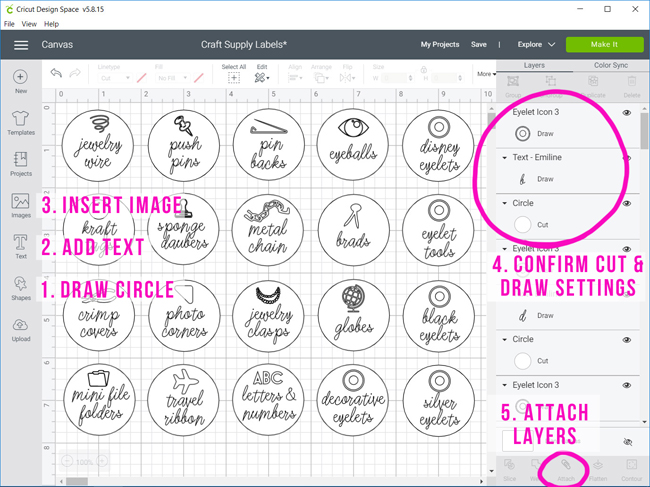
Design Sticker Labels In Design Space
- Begin by using the shape tool to draw a circle and set the size to the desired sticker size. Set the “Linetype” to Cut.
- Add text inside the circle, selecting the desired font, and setting “Linetype” to Draw.
- Click “Image” and use the search tool to find an icon to match the label. {I subscribe to Cricut Access for use of all these images.} Set the image “Linetype” to Draw.
- Check the Layers panel on the right to ensure that each layer is properly set to Cut (for the circle) and Draw (for the text and image). Then select all three layers and select “Duplicate.” Now you can quickly change the text and image for your next sticker. Duplicate and repeat as many times as needed to create all of your stickers.
- After completing each sticker, select the three layers (circle, text, and image) and click “Attach.” This will ensure that these layers stay together, positioned exactly as you want them.
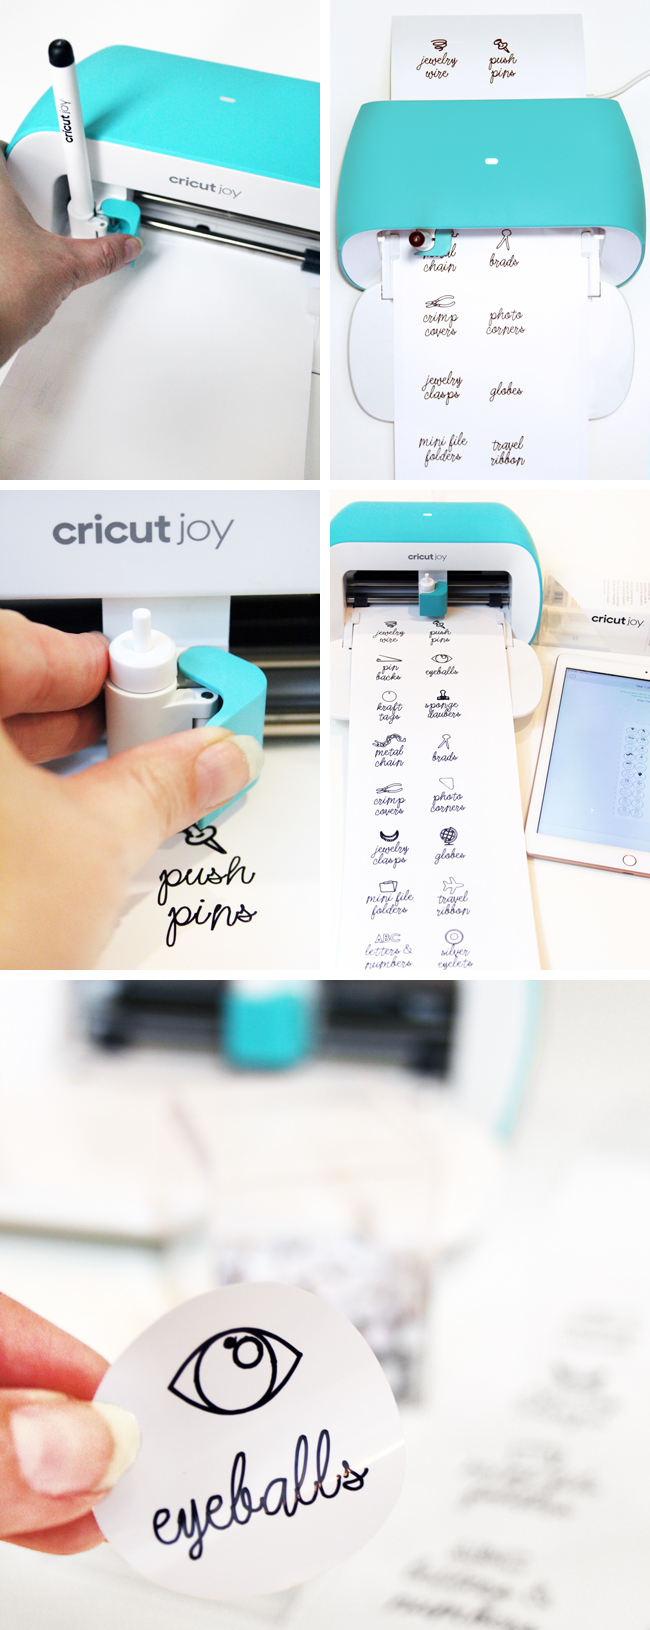
After completing the design of my sticker labels, I was ready to draw and cut with Cricut Joy. In Design Space, I clicked “Make It,” and select “Without Mat,” and selected Smart Label Writable Vinyl as the material.
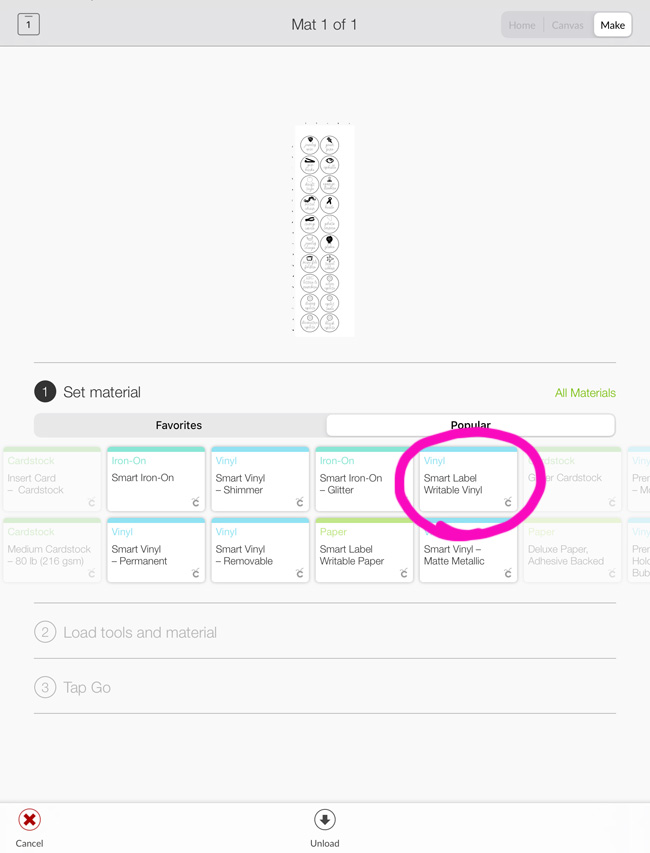
Step-by-step sticker drawing and cutting instructions:
- Click “Make It” in Cricut Design Space.
- Select “Without Mat” and choose “Smart Label Writable Vinyl” as the material type.
- Load a roll of Smart Label Vinyl into the Cricut Joy by feeding the end of the roll into the machine with both hands until the rollers grip the material. The machine will pull the vinyl through the machine to measure that the material is long enough for the selected design.
- Design Space will prompt you to insert a Cricut Joy Pen into the machine housing.
- Select “Go” to begin writing/drawing.
- When the drawing is complete, Design Space will prompt you to remove the pen and insert the blade. Once the blade is inserted, click to proceed with the cut.
- Once the cut around each sticker is complete, click “Unload Mat” in Design Space.
- You stickers are now complete, and can be peeled off of the backing and applied.
I was worried that the written labels would smear or scratch, but the writing felt dry immediately and seems like it will be extremely durable. I just love the way these sticker labels look on my small craft containers!
3. How to Write & Cut Cardstock Labels Using Cricut Joy Mat
A couple of months ago, I purchased some adhesive metal label holders that I planned to affix to the front of each of the drawers in my craft closet. Using Cricut Design Space, I was able to quickly design perfectly sized inserts for these label holders.
Design Label Holder Inserts In Design Space
I started by measuring the label holders to determine the exact size for my finished labels.
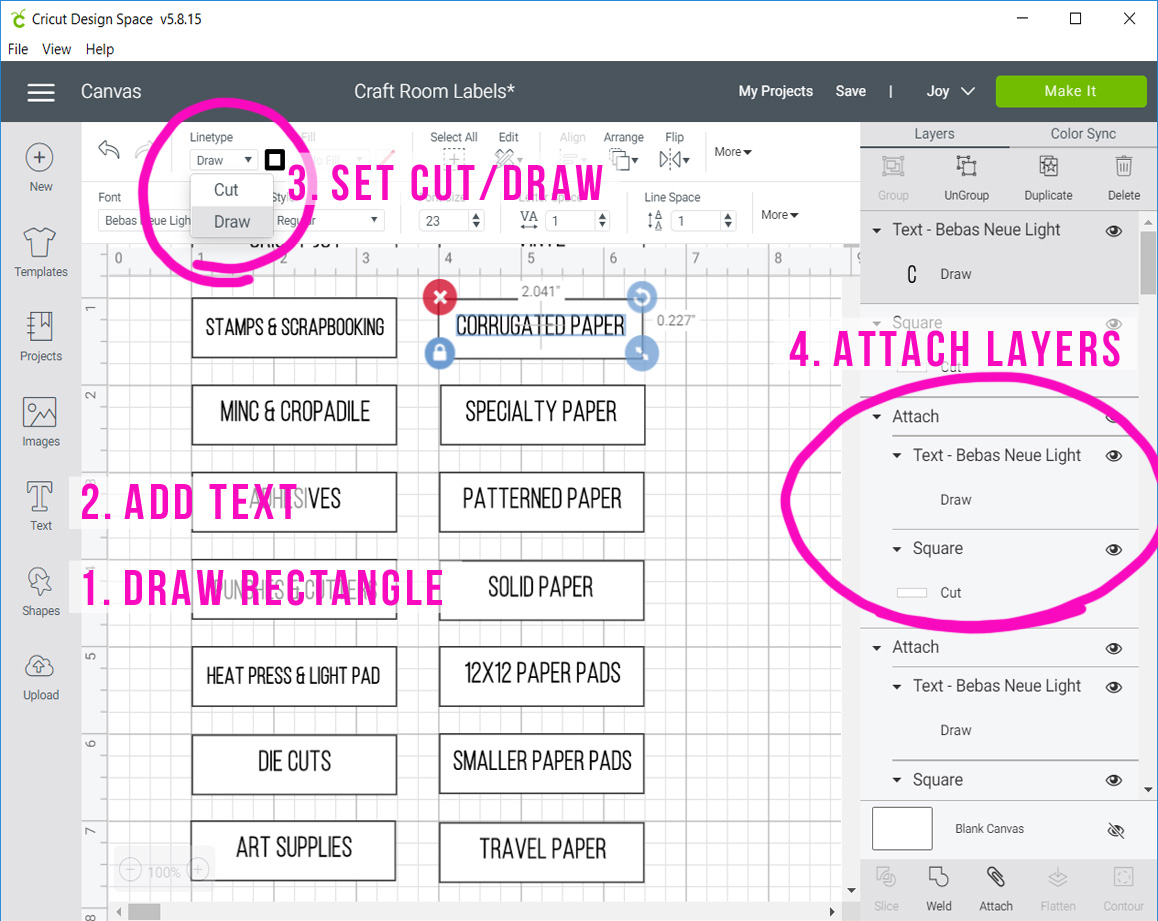
- Begin by using the shape tool to draw a rectangle and set the size to the desired label size.
- Add text inside the rectangle, selecting the desired font.
- Select the rectangle layer and set the “Linetype” to Cut; select the text layer and set the “Linetype” to Draw.
- Then select both layers and select “Attach.” This will ensure that these layers stay together, positioned exactly as you want them.
- Next, select “Duplicate” to create more identical labels. Duplicate as many times as the number of labels you want to make. One by one, “Detach” the a rectangle/text pair – change the text for your next label, and reattach. Continue this process until you have the right text on each label.
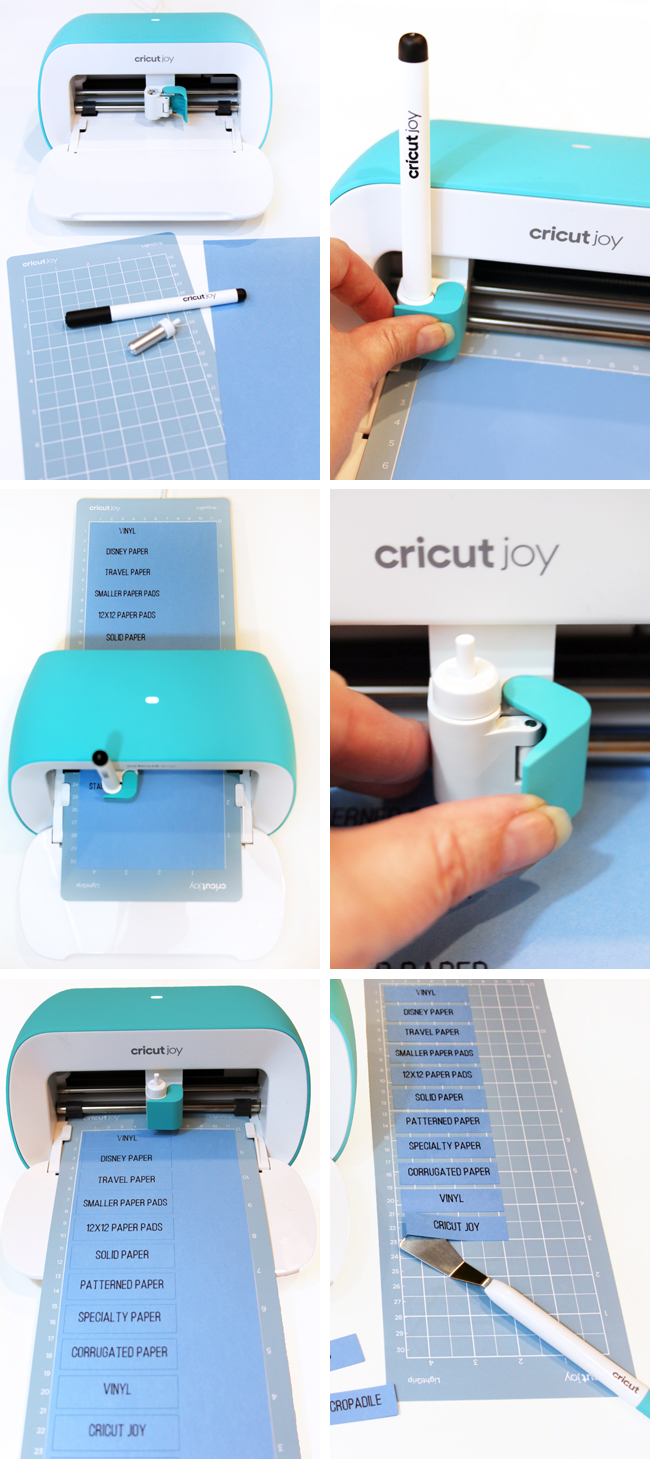
Unlike the prior two labels that I created using adhesive vinyl, I wanted to write and cut these labels on cardstock to insert into the label holders. As a result, I needed to use a mat for this Cricut Joy project. I cut a 12×12 piece of cardstock down to two pieces to fit the mat.
In Design Space, I clicked “Make It,” and selected “On Mat.”
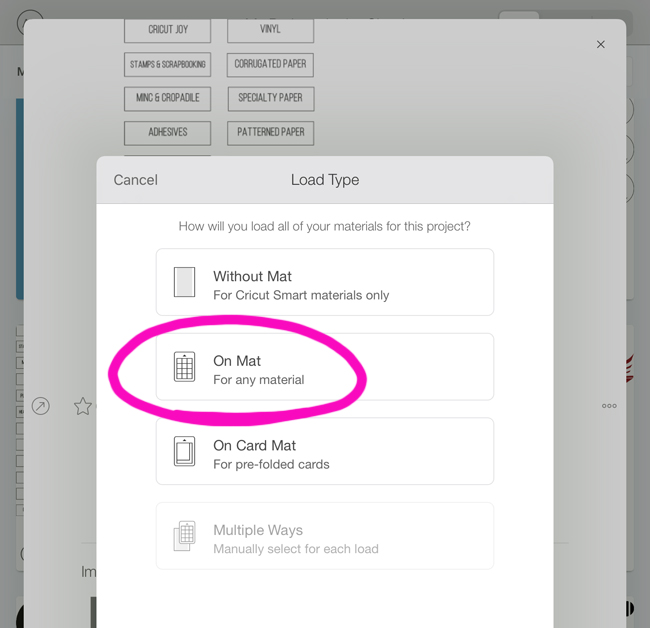
I then selected Medium Cardstock as the material. Since this was my first time cutting cardstock with my Cricut Joy, I was concerned about whether the pressure would be enough for a clean cut of the paper, but it came out perfectly.
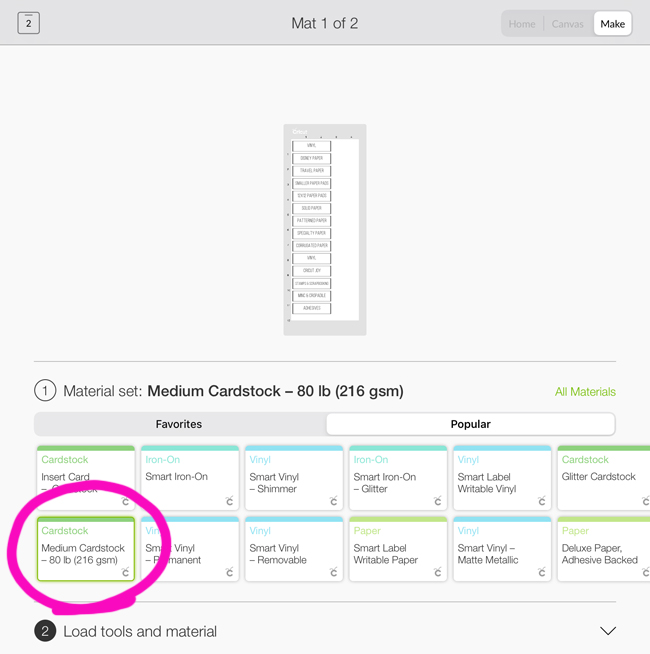
Step-by-step label drawing and cutting instructions:
- Click “Make It” in Cricut Design Space.
- Select “On Mat” and choose “Medium Cardstock” as the material type.
- Place a piece of cardstock on the Cricut Joy mat.
- Load the mat into the Cricut Joy by feeding it into the machine with both hands until the rollers grip the mat.
- Design Space will prompt you to insert a Cricut Joy Pen into the machine housing.
- Select “Go” to begin writing.
- When the drawing is complete, Design Space will prompt you to remove the pen and insert the blade. Once the blade is inserted, click to proceed with the cut.
- Once the labels are cut, click “Unload Mat” in Design Space.
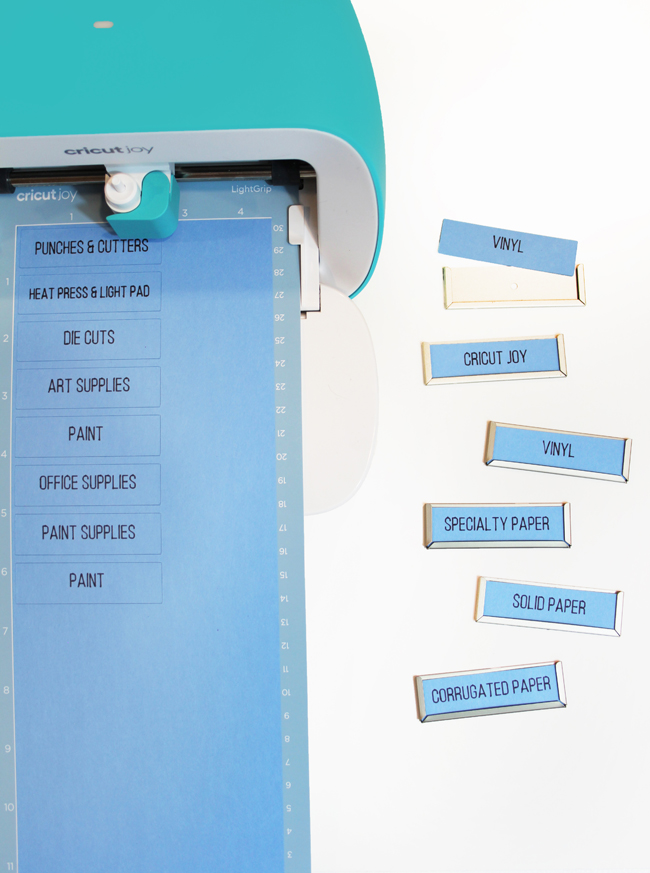
- Use a spatula tool to carefully remove each label from the mat.
Writing and cutting these labels with the Cricut Joy made this project so quick and easy. They look much nicer than if I hand wrote them, and it was so much easier than printing the labels on my home printer and then trying to measure and cut them to just the right size.
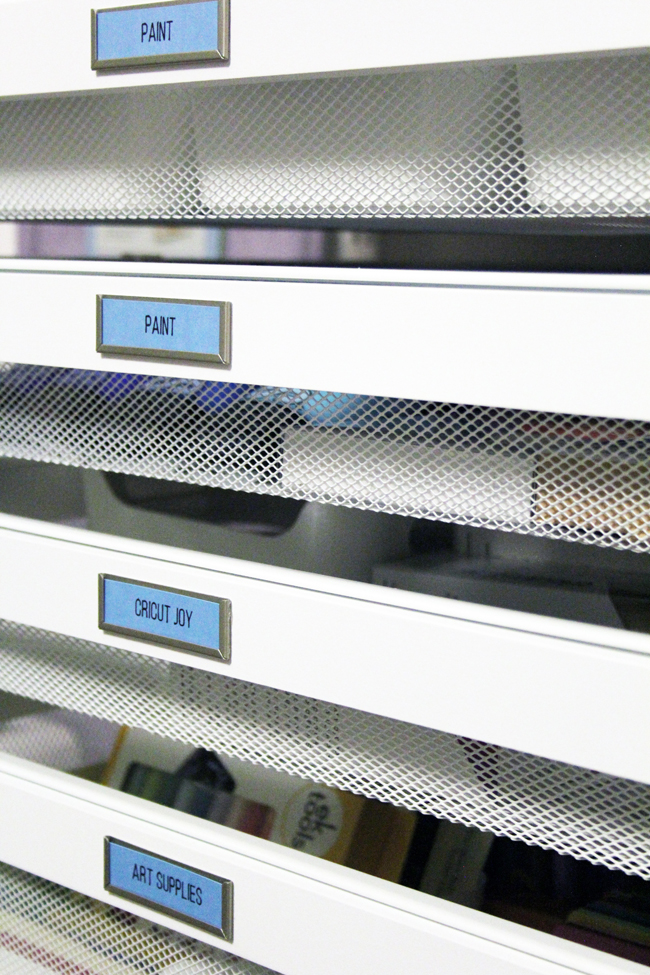
The labels slid perfectly into my label holders!
I know that over time, the contents of my craft drawers will probably change as I use up certain supplies and purchase new supplies for different projects. As a result, it was important that I could easily update these labels over time.
Now that I have the size of these labels saved in my Design Space projects, I can update the labels quickly and easily in the future.
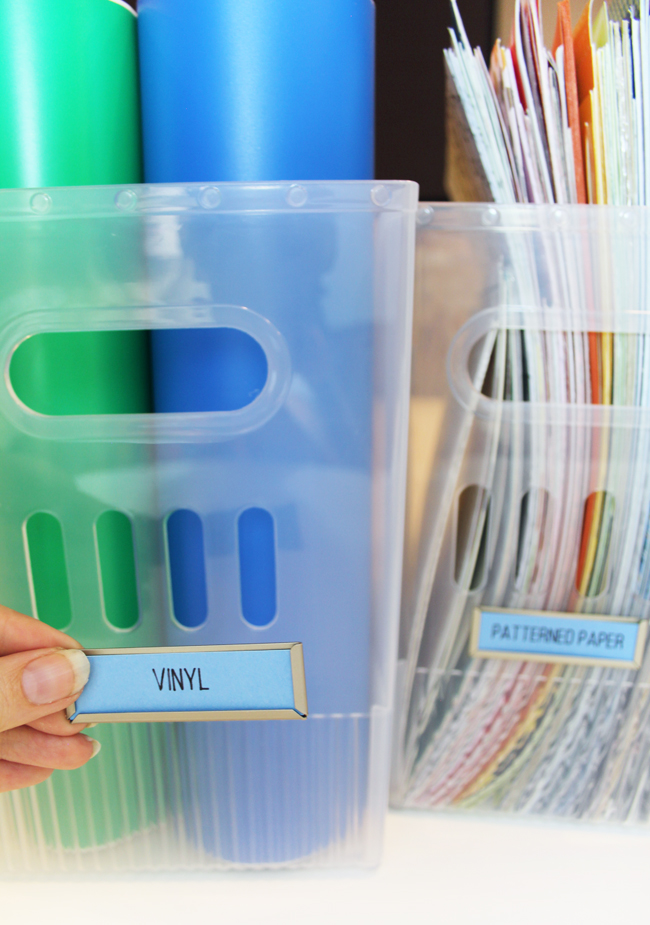
I used these same adhesive holders to add labels the bins filled with all of my papers and rolls of vinyl.
4. Create Vinyl Icon Labels for Small Drawers
A few years ago, I purchased a box with small drawers to organize all of my family’s tech chargers and cords on the corner of the kitchen counter. In this blog post, I shared the step-by-step instructions for designing these icon labels in Cricut Design Space.
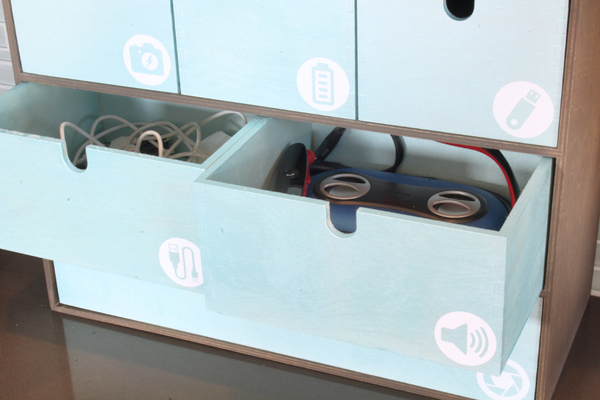
My husband now wants some similar labels for the drawers in his office, so I plan to take my Cricut Joy and iPad with me to his office this weekend. It will be so convenient to design, cut, and apply them as soon as I finish organizing his drawers. In the past, I would have had to make notes, come home to cut the labels on my larger machine, and then go back to his office the next day to put them in place.
5. Custom Vinyl Labels for Computers and iPads
My boys each received a Chromebook for Christmas last year, and while we’ve been doing school-at-home during these recent months, they are using them daily. Since their computers are identical, it leads to frequent arguments about whether little brother has picked up big brother’s computer and vice versa.
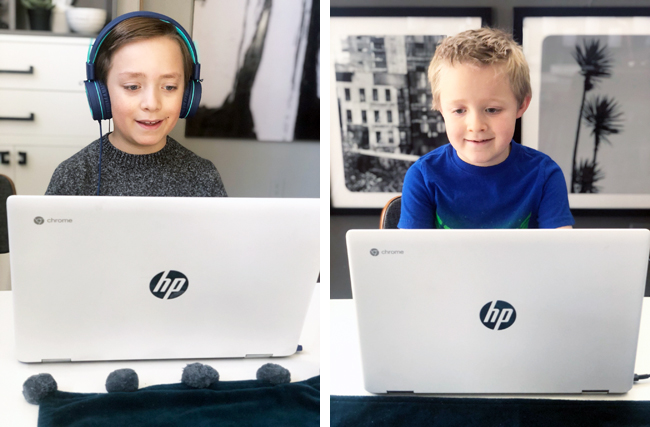
Recently I used my Cricut to create some custom backpacks and t-shirts for a fabulous charity that benefits foster kids. My boys loved the geometric rhino and barcode guitar that I used for this project, and begged me to make something for them with the same designs.
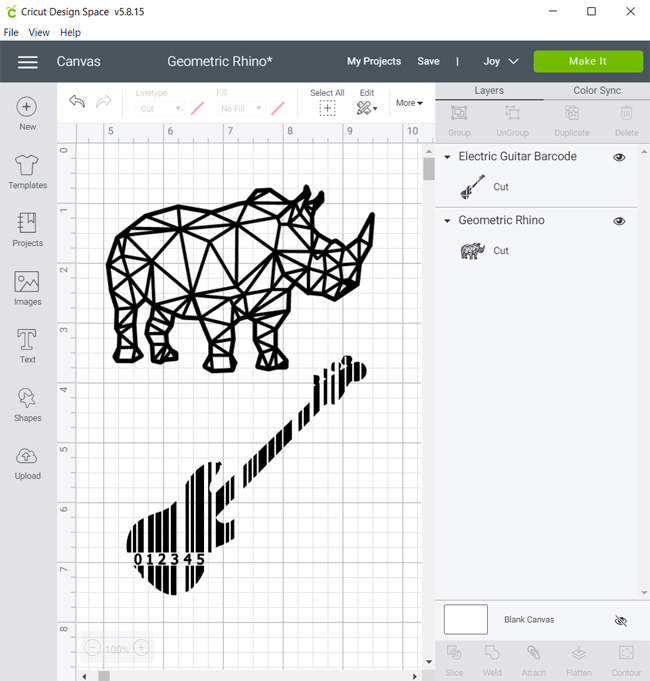
I plan to cut both designs on my Cricut Joy using black adhesive vinyl – I’ll apply the rhino to the corner of my older son’s Chromebook, and the guitar to my younger son’s computer. Arguments solved!
Cricut Joy is Perfect for Organizing & So Much More!
If you’ve been thinking about purchasing a Cricut for labeling and home organization, Cricut Joy is the perfect machine! It’s small enough to store anywhere and so easy to use! I especially love the ability to design and cut from my iPad, connect via bluetooth, and cut the Smart Vinyl without a mat. It’s perfectly portable around the house, and I’m excited to take it with me when organizing for clients as well!
