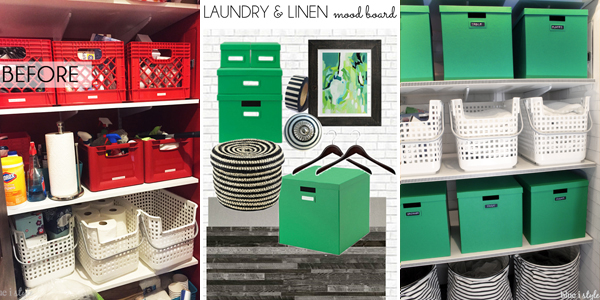
One Room Challenge reveal day always makes me want to jump for joy, and this time around, it also makes me want to do laundry… and I never thought I’d say those words! I am seriously giddy to show you guys the total transformation of our laundry closet, and the improvements to the adjacent linen closet!
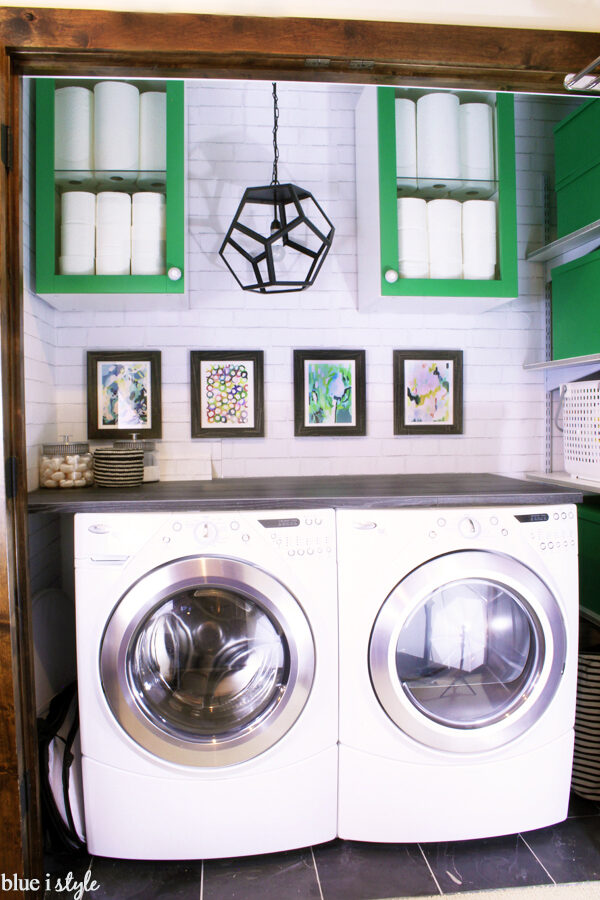
I am so in love with our brand new light and bright laundry space that I could seriously stare at it all day {and, let’s be real…I might}!
I owe a huge thank you to all three of my sponsors for this project – IKEA Centennial, Minted, and Tempaper Designs! This project would not be what it is without the support of these companies and their awesome products, and I’ll point out their contributions throughout this post. Additionally, this post contains some affiliate links, so if you buy something I recommend you’ll pay the same price, but I may receive a small commission.
To fully appreciate the beauty of our update space, you need to see what it looked like just five weeks ago! It was so red, dark and shadowy, and totally didn’t fit the style of our home. It was the first space I completed when we moved in seven years ago, and while I know some of my readers love it, for me personally, it was ready for a makeover.
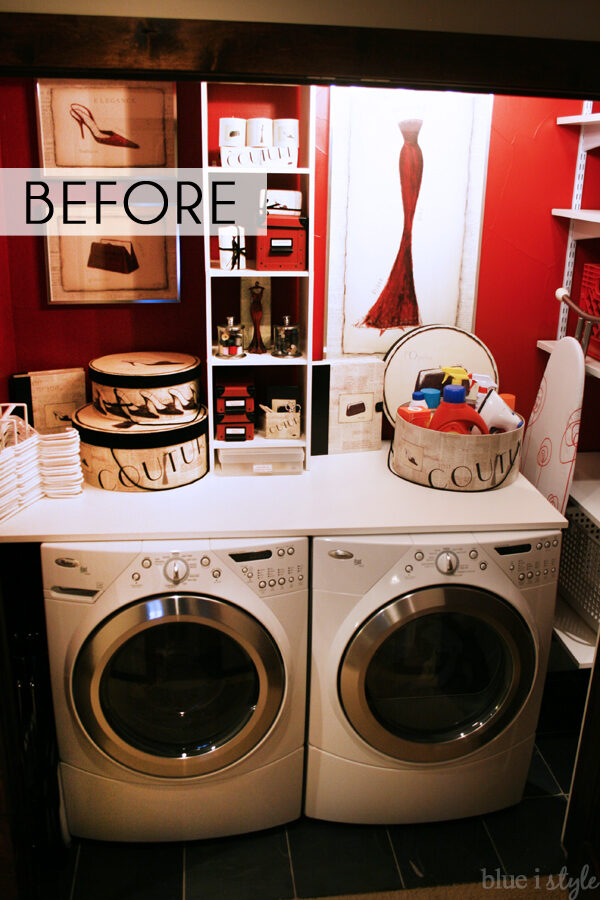
Thanks to the kick in the pants motivation that is the One Room Challenge, I now have the laundry closet of my dreams. Well, let’s be honest… in my dreams it’s actually a big room instead of a closet. But it would still look just like this!
Ok, before we get back to the pretty pictures, let me give you some context. Our laundry closet and linen closet and linen closet are accessed by two separate sets of double doors in our second floor hallway, but internally it is one open closet space.
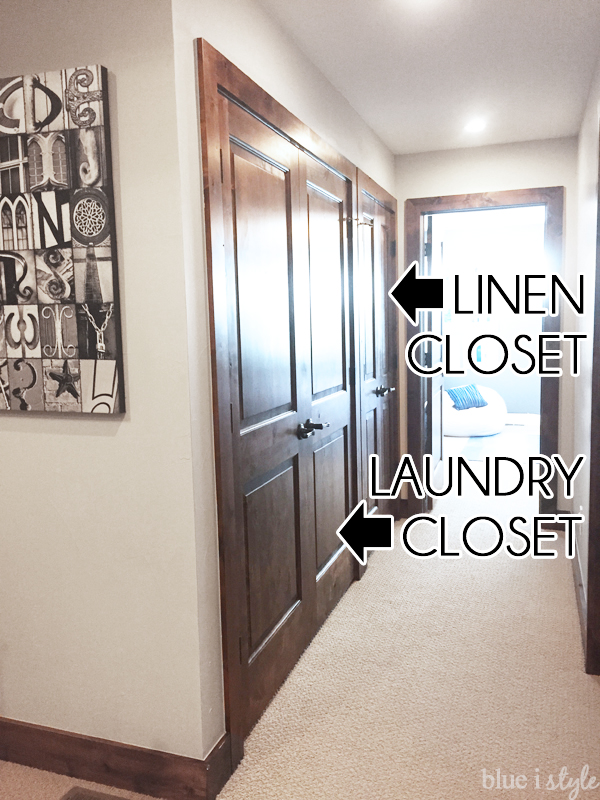
As you might suspect, photographing closets is a bit of a challenge, both in terms of light and angles, but I’ll do my best to show you all the pretty details, and of course, all of the stylish function and organization!
I’ve been wanting to find a place in our house to incorporate some gorgeous Kelly green, and this was the perfect spot!
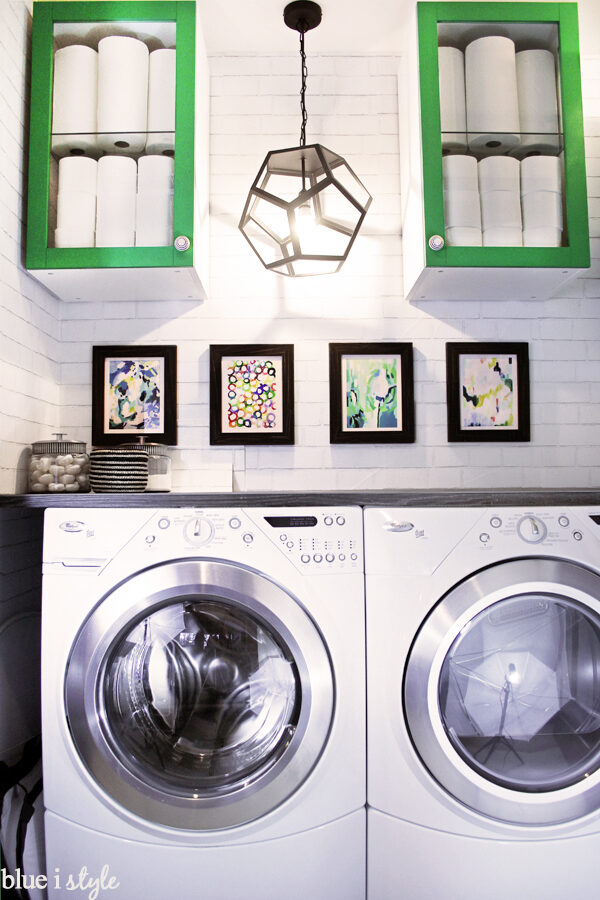
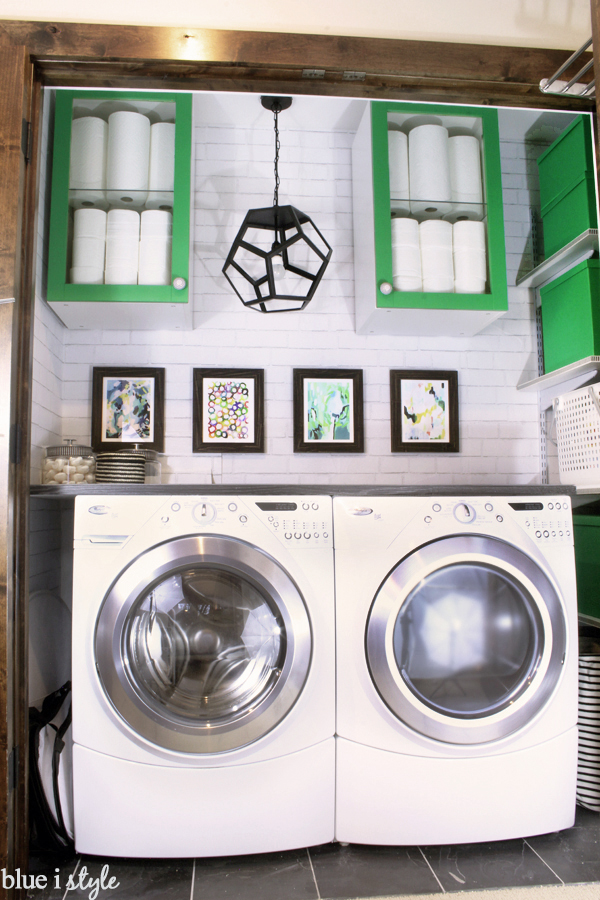
If you saw just the photo above, you might not realize this was a laundry closet instead of a room – and that was exactly my goal! I wanted to design it to both look like, and function like, a larger more luxurious space … a space I’d want to actually spend time in.
But nonetheless, the closet doors are actually a vital part of the overall design, because they now pack a ton of storage and function!
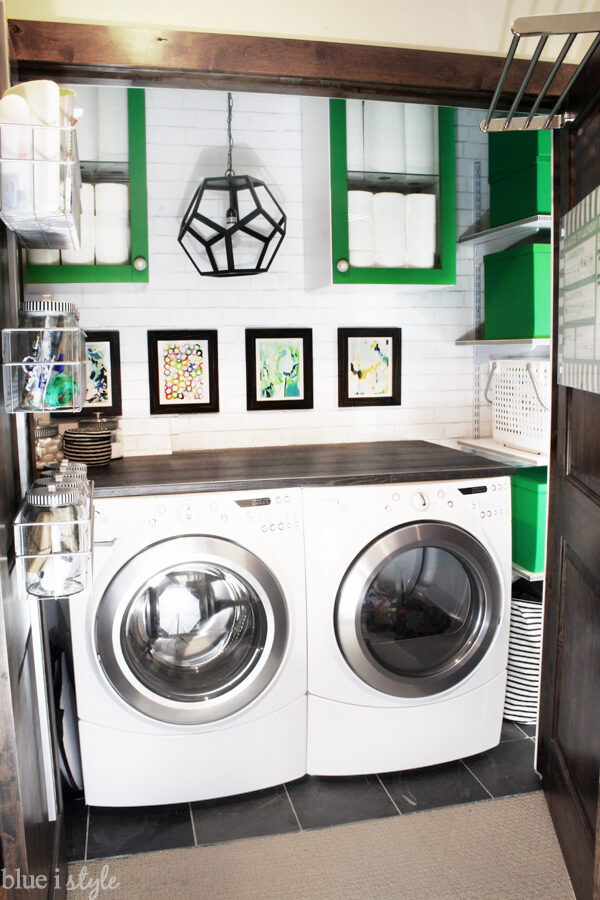
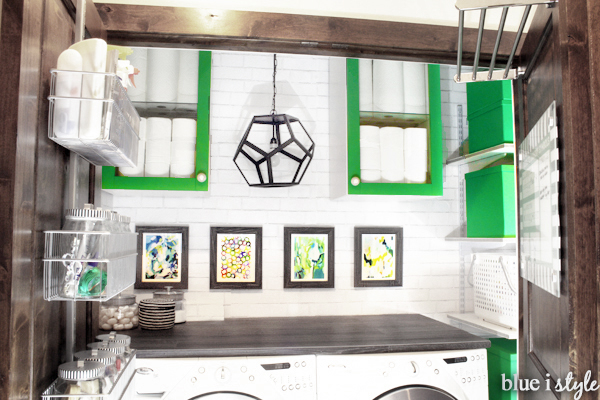
The concept for this design really started with the wallpaper. I met the folks from Tempaper Designs at a trade show in New York this summer, and I immediately fell in love with their textured Brick White temporary wallpaper. By the time I was on the plane home to Denver, I was already mentally redesigning the laundry room! Read the full tutorial on how to install temporary wallpaper here.
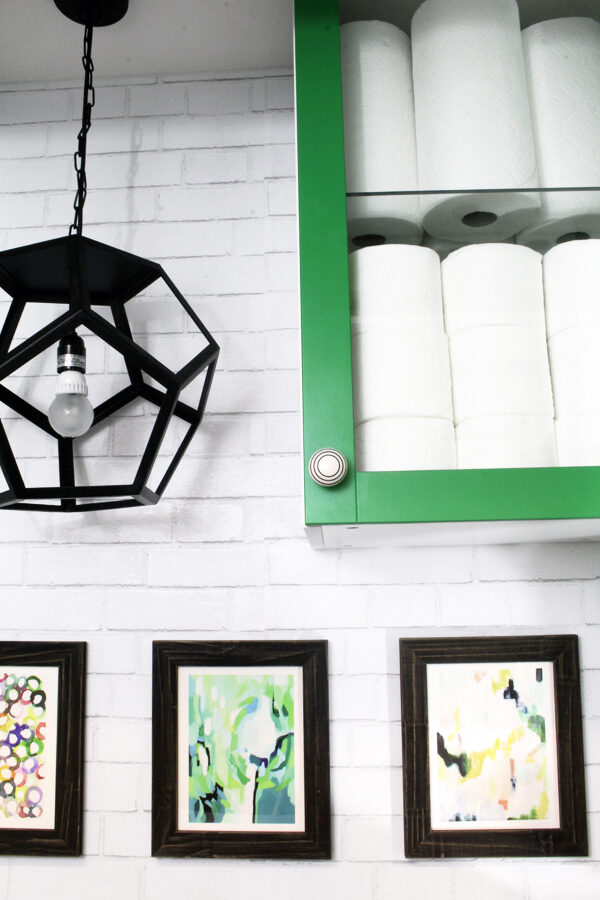
In order to balance out all that white, I wanted to add a bright pop of Kelly green – but I didn’t want it to be overwhelming, so I chose SEKTION cabinets from IKEA with glass front BJORKET doors, then I painted just the birch door surrounds in Sherwin Williams Kilkenny.
And then there is the light! I had my eye on it for months, but when I went to by it at World Market, I discovered that it had been discontinued. A few phone calls and a road trip later, I was able to buy the last remaining floor model in Colorado, but it was totally worth the effort, because, it’s PERFECT for the space!
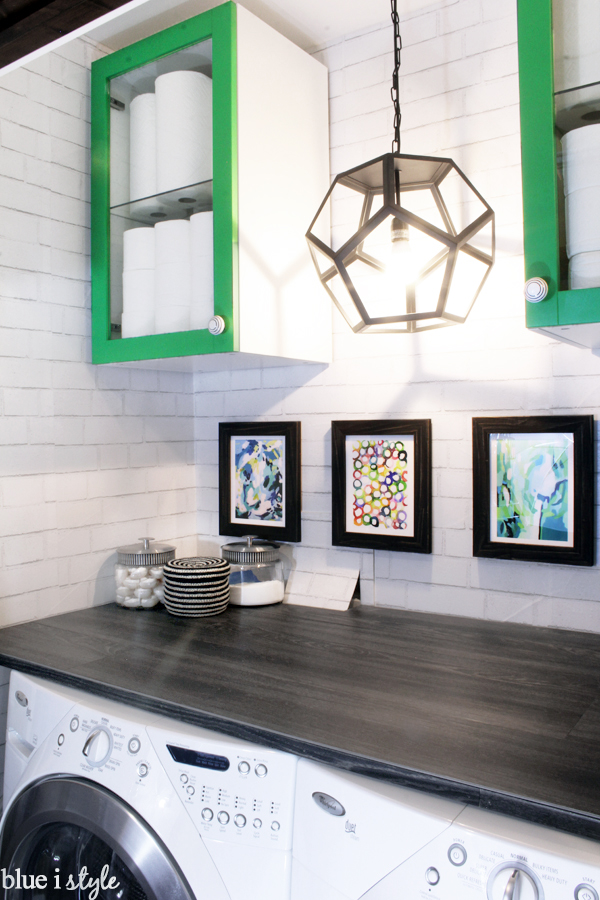
My original design plans anticipated us purchasing a laminate countertop in with a black-grey plank wood appearance, but when the quote came back at over $600, it was a no go!
We had previously been using a simple white melamine board as a “counter,” so we got creative and found a way to cover that existing white board using vinyl flooring to create a plank wood countertop look very similar to the laminate version we had our eye on – but for a fraction of the cost. Read the full DIY laundry room countertop tutorial here.
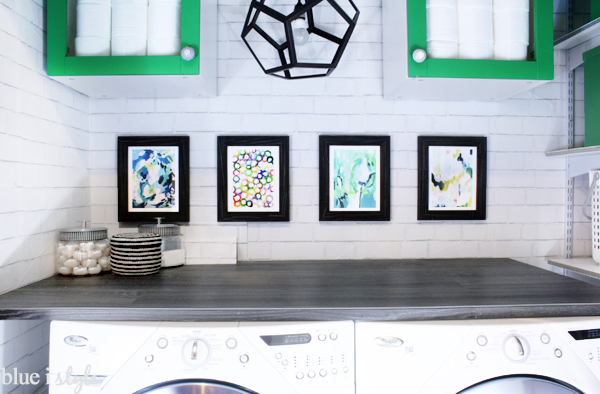
I am a firm believer that art has a place anywhere and everywhere – including in a closet! I always drool over the Minted catalog full of gorgeous works from independent artists, and this laundry room makeover was the perfect spot for some of my very favorite pieces! From left to right: Dash by Katy Craig; Life In Color – Connections by Aimee Siberon; Splendid Spring II by Makewells; and The Meadow by Melanie Severin. All four prints are 8×10 in size are were custom framed by Minted in their distressed charcoal stained frames.

One of my biggest gripes about our old laundry room set up was that there was too much stuff on the countertop, which didn’t leave enough space for folding laundry – so keeping the counter in the new space wide open was one of my biggest goals. But that also provided a new challenge…
In the old laundry room, I used a large hat box to hide the faucets and hoses, but in the new design plan, in order to even space the art above the countertop, one on the frames needed needed to overlap the faucet inset. In order to make that workable, I wanted to find a way to make the laundry plumbing visually disappear. Here’s an in process shot from last week to remind you what I’m talking about…
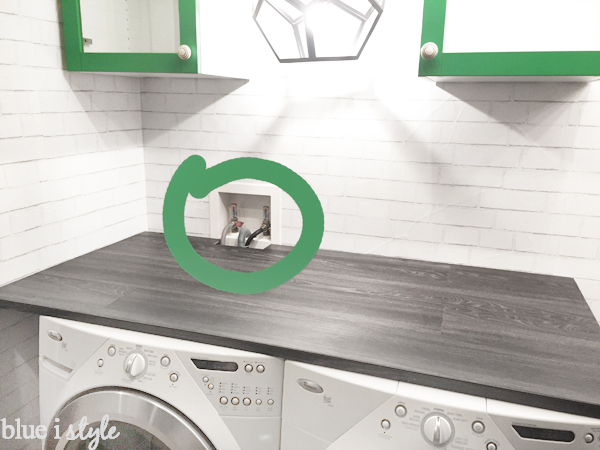
Now you see it, and now you don’t…
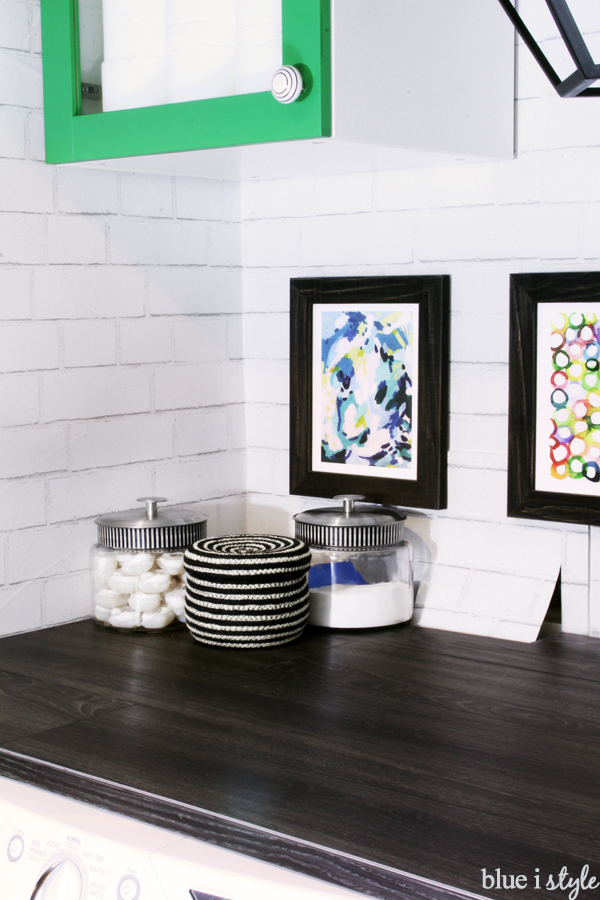
It turns out that hiding the faucets and hoses was actually a super quick and easy project. I shared the tutorial for how to hide laundry room plumbing here.
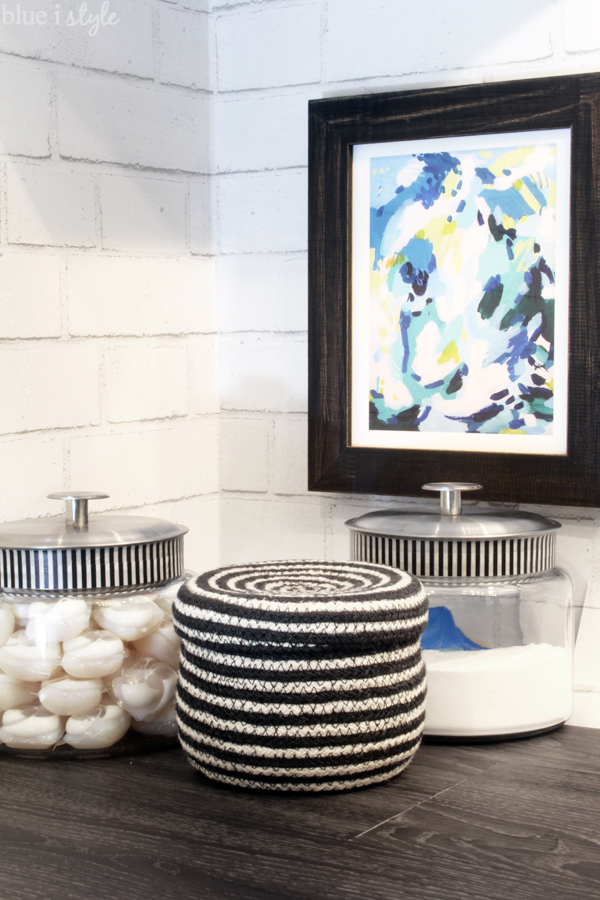
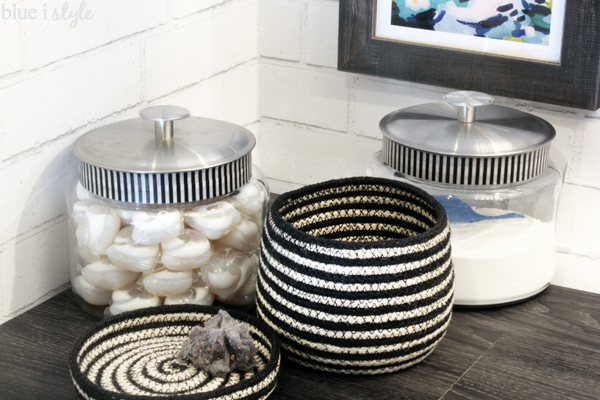
To keep the countertop open and free for laundry folding, I limited the items on the counter to two canisters that store laundry detergent pods and OxiClean powder, as well as an adorable little black and white striped basket. There is no room for a trash can in the laundry closet, so I used to create a pile of lint on the counter before finally carrying it all to a trash can elsewhere in the house – but now I can stash all of that lint away in this basket, and then just empty it when it fills up. Sometime it’s the little things!
I love the look of the glass front cabinets, but they could quickly become an overwhelming and distracting element in the room if I filled them full of all of our laundry detergents and various cleaning supplies. Instead, I decided to fill them with all of the extra toilet paper and paper towels that used to take up so much space on the linen closet shelves. Now I can store much more than before, and toilet paper has never looked so pretty!
Of course, that meant that all the laundry supplies had to be stored somewhere else, and that’s where the closet doors come in!
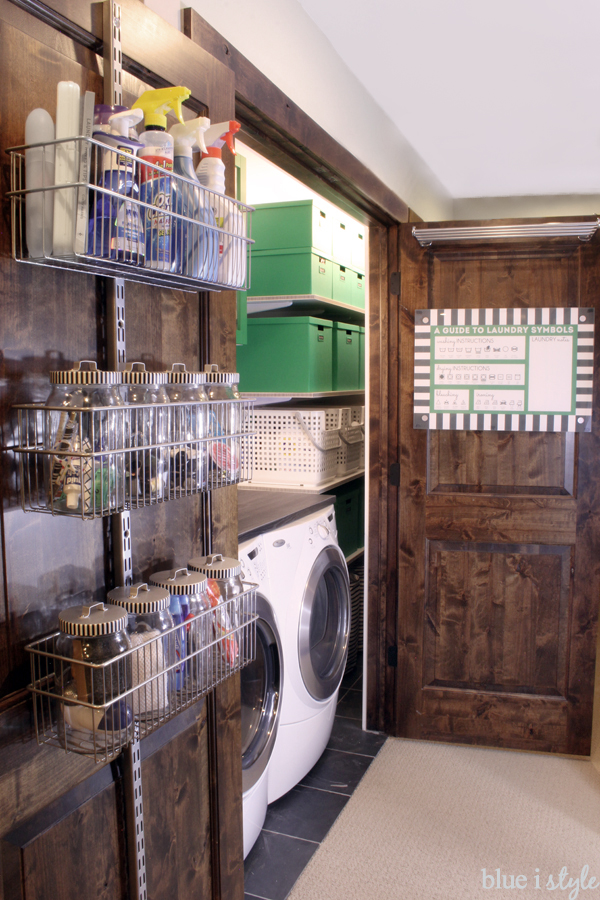
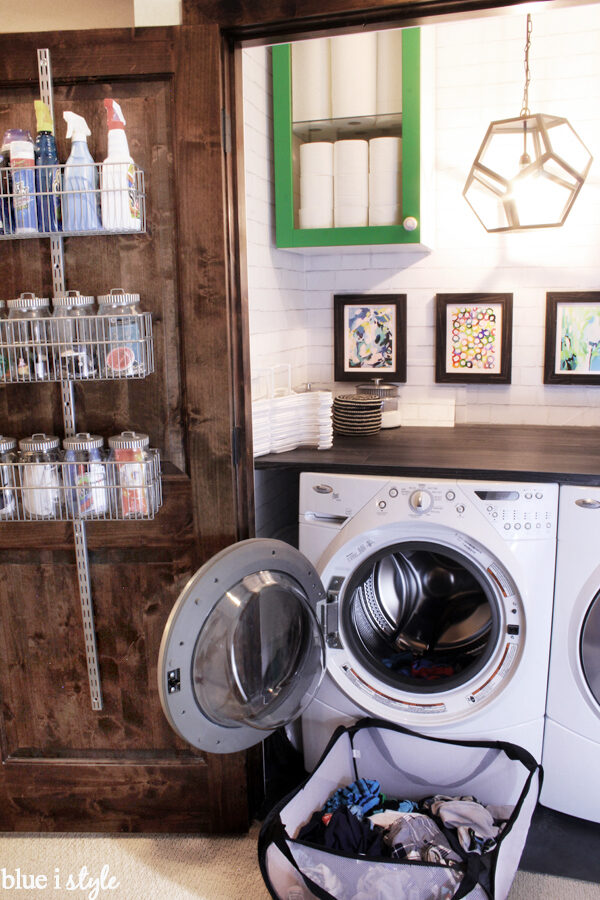
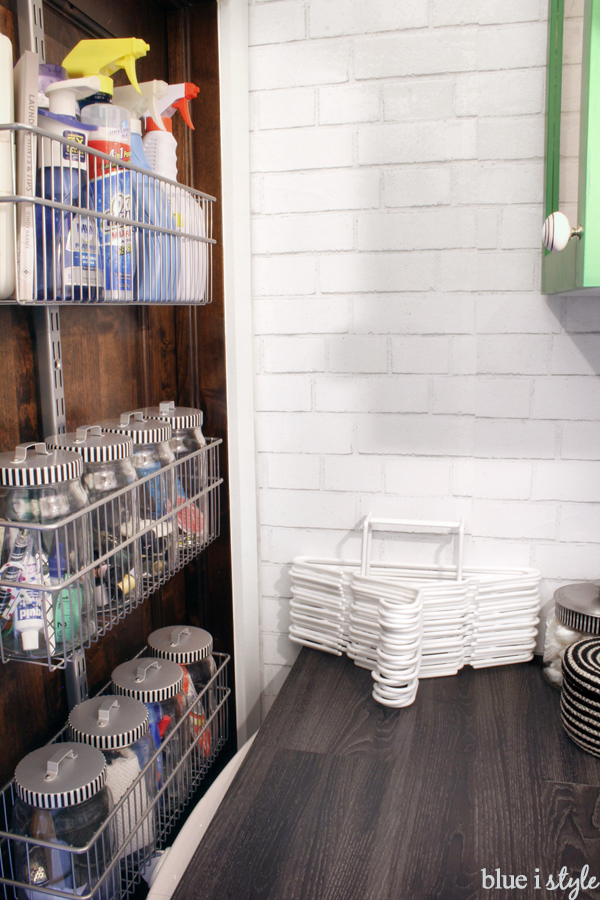
The left door now has three baskets that contain everything that was previously stored in various boxes on the countertop.
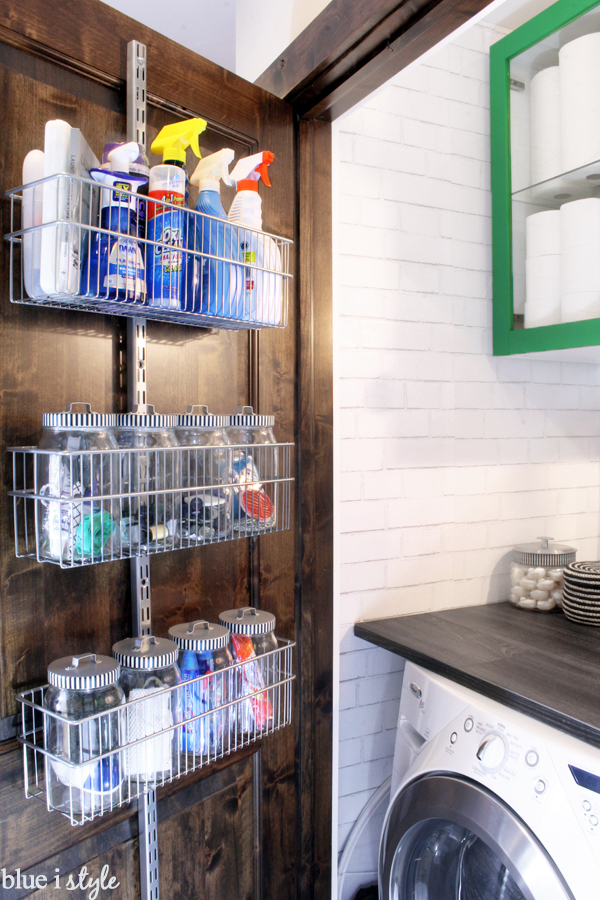
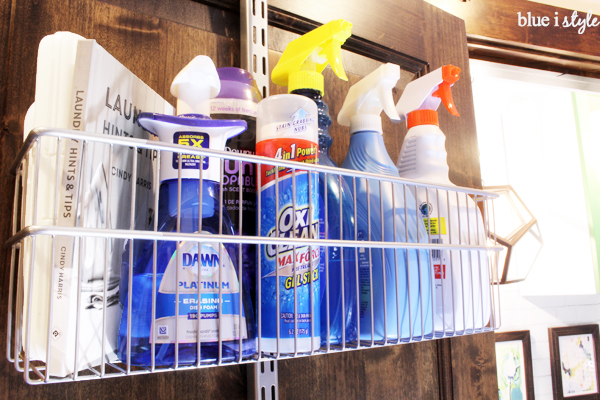
The top basket {far out of the kids’ reach} holds all of our various sprays and stain removers.
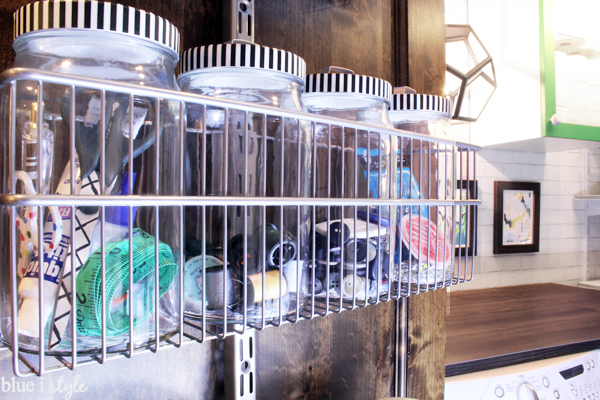
And the two lower baskets hold eight matching jars {that I dressed up with a little washi tape}. The jars hold everything from replacement buttons and sewing supplies, to bleach pens and lint rollers. Check back next week for all the organizing details!
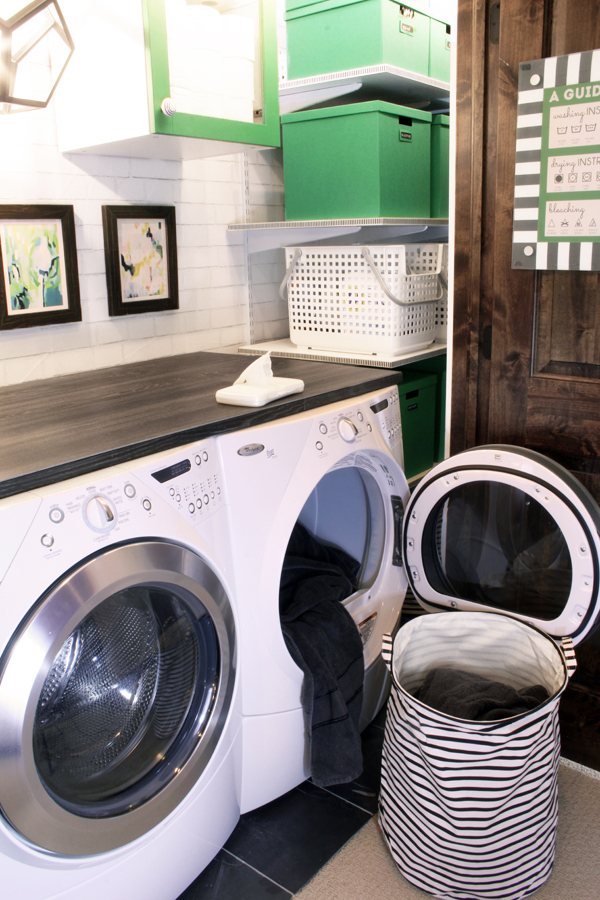
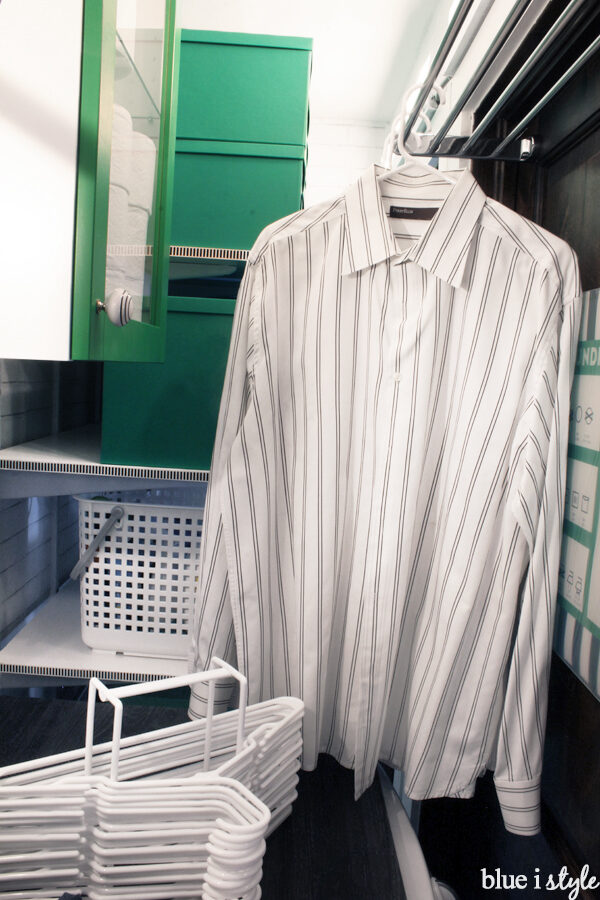
On the opposite door, we installed a four rail towel hanger that functions for hanging clothes as they come out of the dryer, as well as for clothes that need to hang to dry.
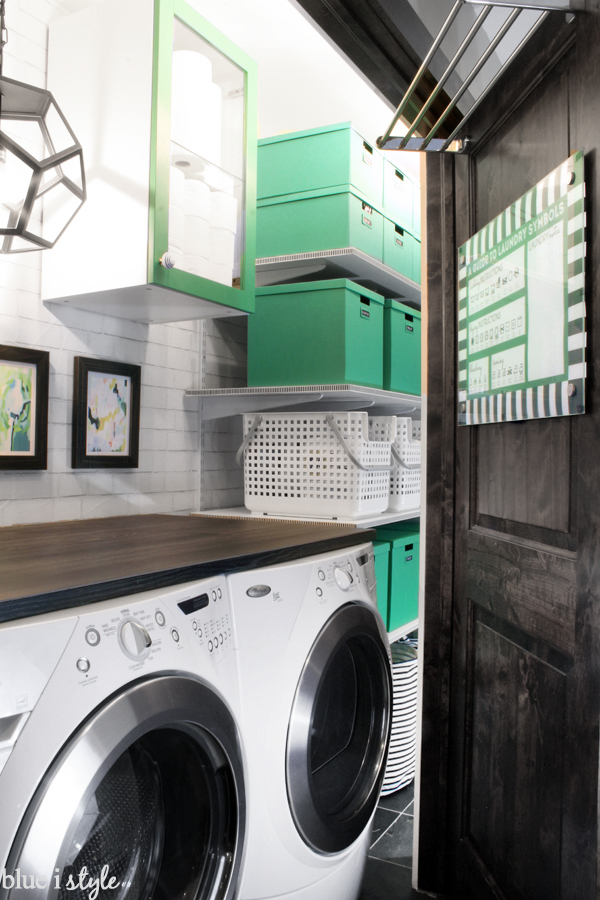
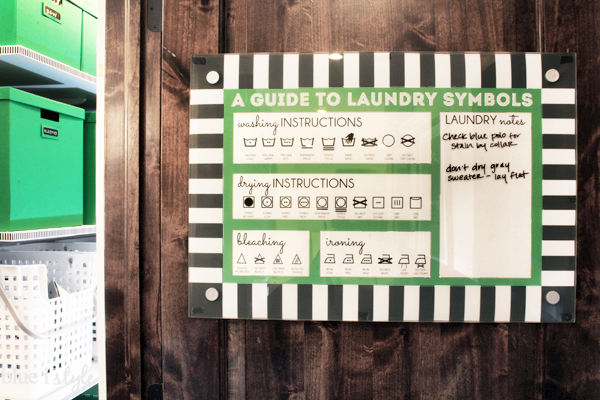
Below the hanging rack, I created a guide to laundry symbols that I mounted behind a glass memo board. I left a space for laundry notes.
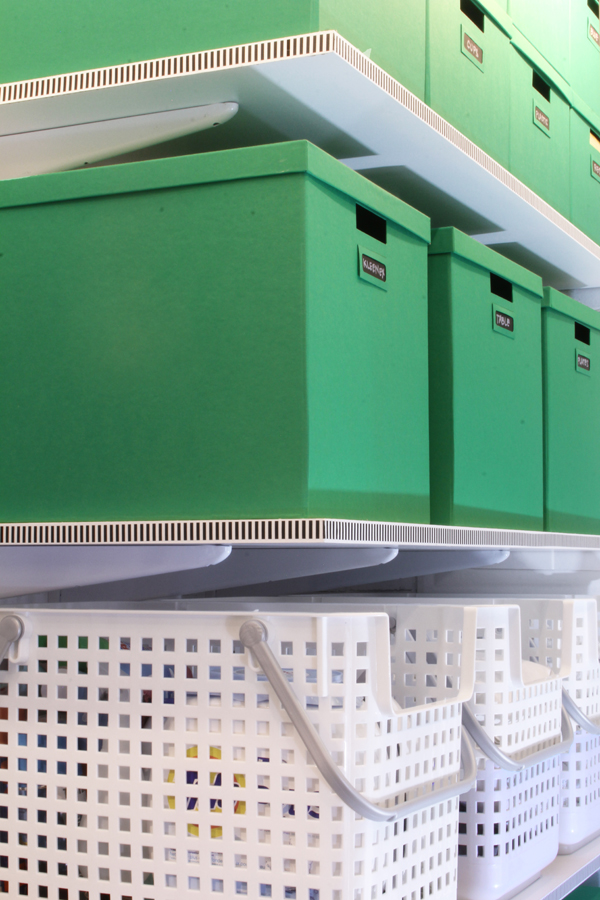
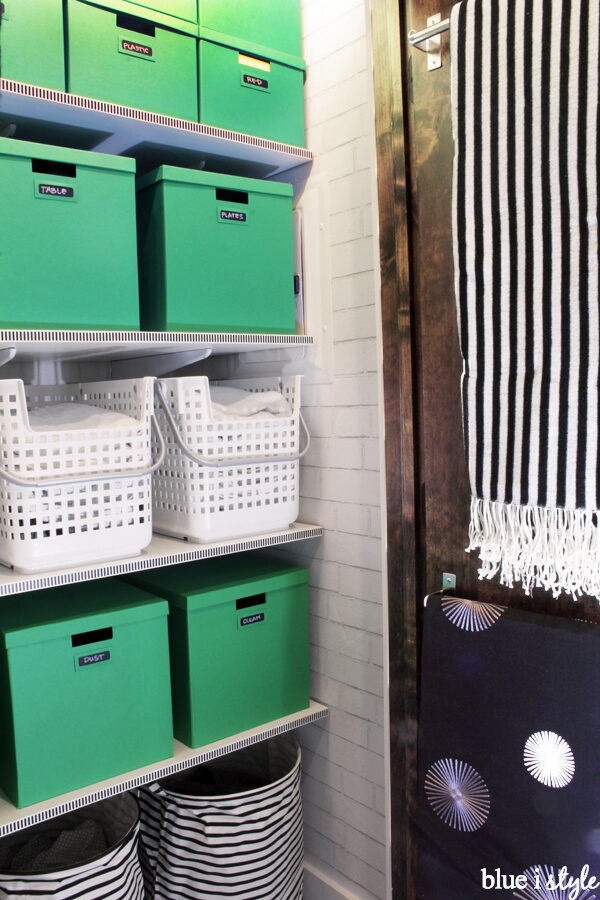
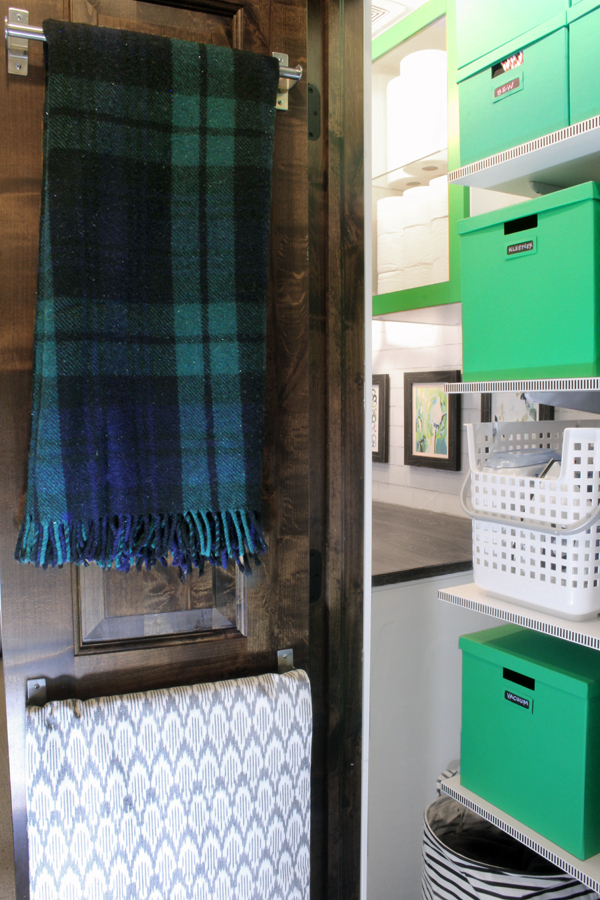
Now that you’ve gotten a few little peeks into the linen closet side of the space, let me show it to you in all of it’s organized glory. Of course, you know I like to make all my organized spaces pretty as well, so in addition to the matching storage boxes from IKEA, I also added some black and white striped washi tape to the edges of the shelves. Grab the quick, five minute shelf edging tutorial here.
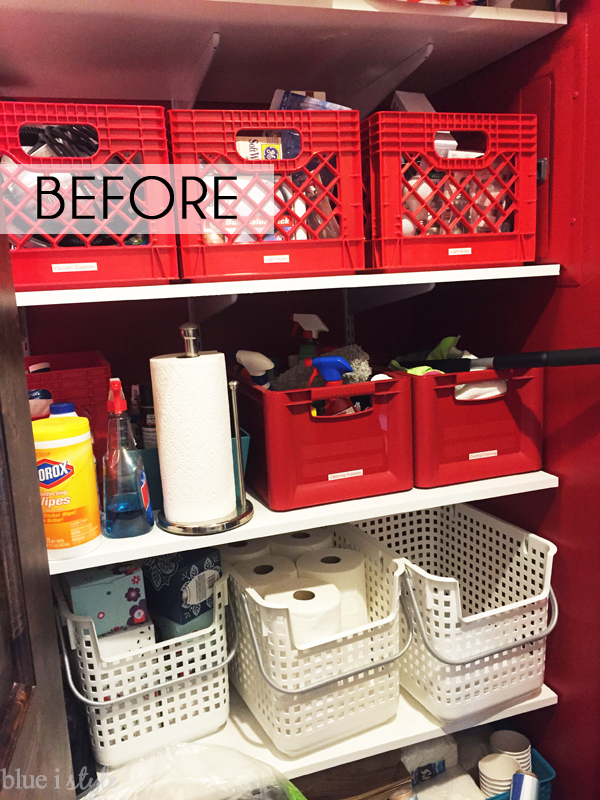
Here’s a reminder of what the linen closet looked like five short weeks ago. It was organized(ish), but within the bins it was a mess, and it was feeling overwhelmingly red.
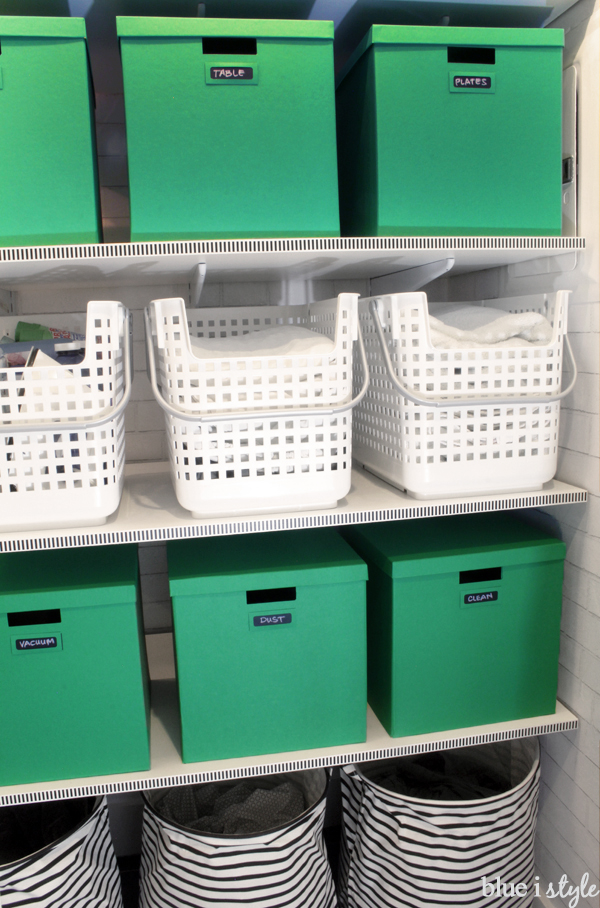
And now, it looks more streamlined, but it actually stores so much more! The rows of matching baskets and boxes on the linen closet shelves provide the perfect combination of open and closed storage, and the color makes me happy every time I open the doors!
The doors are doing double duty here as well – providing storage for extra blankets and all my table runners!
I’ll share a full post about the linen closet organization in a couple of weeks, so be sure to check back in for all the details!
Before I call it a wrap, I want to show you this space in action. I mean, what good is a pretty laundry room if it doesn’t work hard, right?
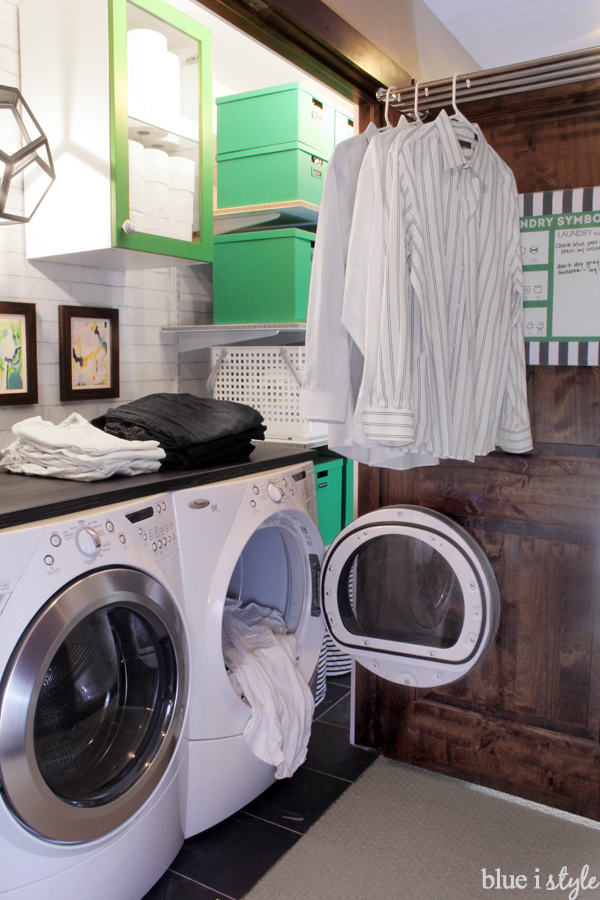
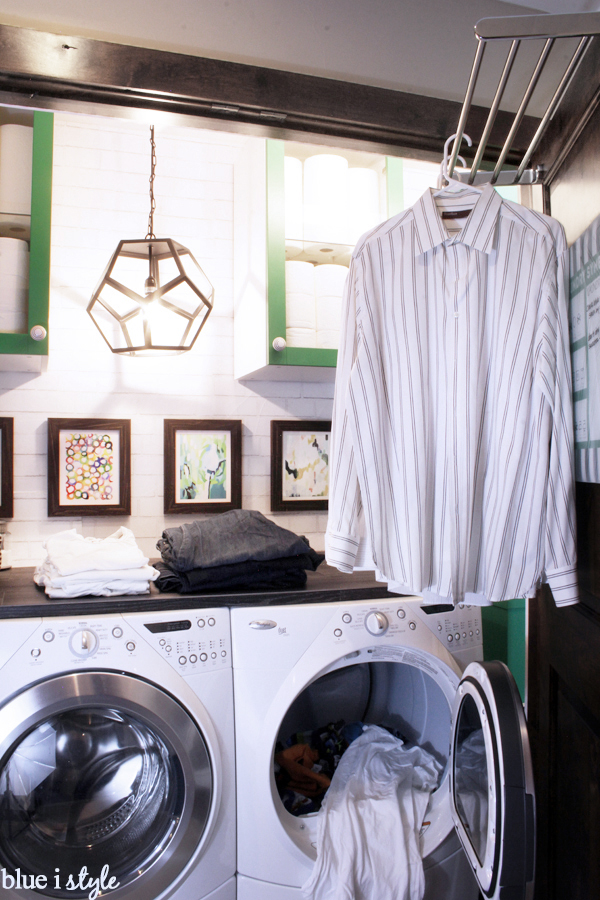
With two little boys in the house, laundry seems to be a constant, so the doors to the laundry room are open more often than not. But when we want to hide it away, we can simply close the doors and call it a night.
When we installed the baskets on the back of the left door, we positioned them so that the bottom basket would sit just above the top edge of the washing machine when the the door is closed.
You can see that even when the doors are closed, there is room for clothes to hang on the back of the door! When installing the rack on the back of the door, we were very careful to position it high enough that my husband’s dress shirts would hang just above the top of the countertop when the doors were closed.
And with that, I’m calling it a wrap on the One Room Challenge!
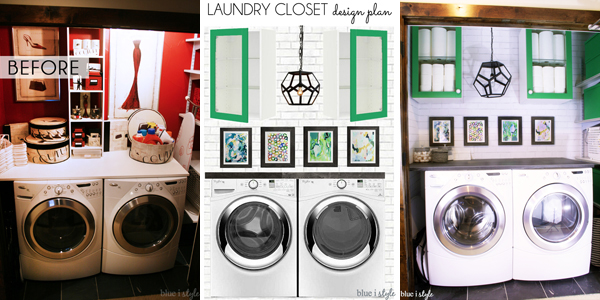
I’ll leave you with the before and after comparisons! I’d say the final spaces look pretty darn close the plans I dreamed up.
