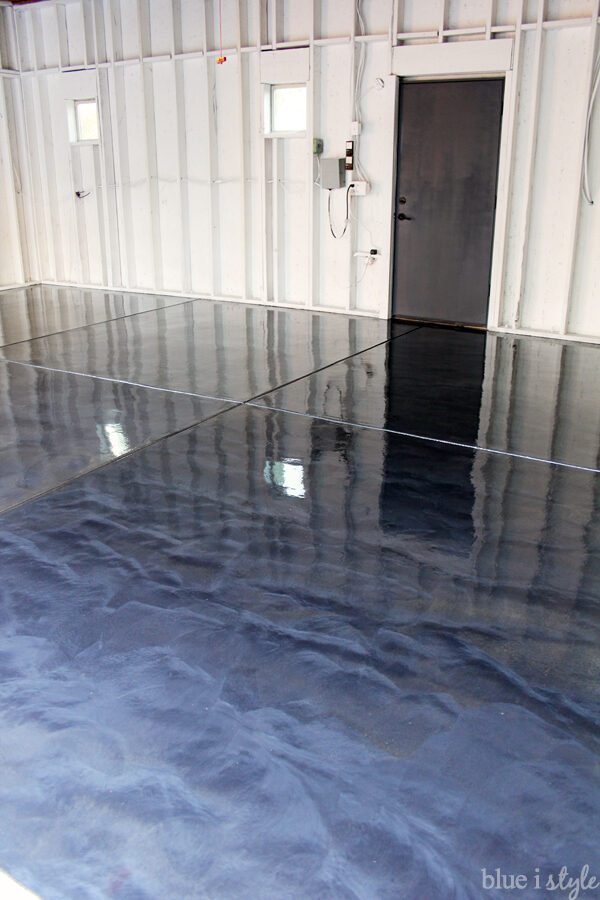
I am so excited to show you our brand spanking new RockSolid metallic garage floor coating!
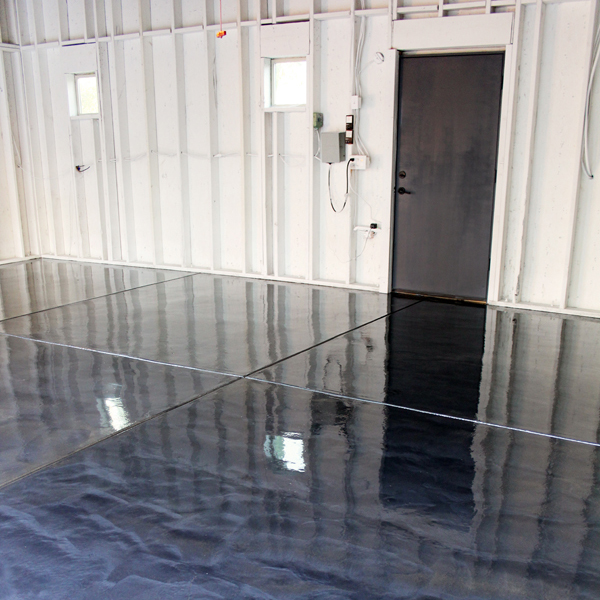
Isn’t she stunning?! {Yep, I’ve decided she’s a she.} We are well on our way to transforming the garage in to our very own DIY retreat!
In this post, I have lots of photos and a full tutorial of this shiny, happy metallic floor finish. First though, I have to come clean and admit that this was one of those DIY projects that I really wanted to do, but I was so scared I’d mess it up!
Now that it’s done, the number one thing I want you to know right up front is that this is not hard! Time consuming, yes, but totally doable!
This post is sponsored by Rust-Oleum®, but as always, all ideas and opinions are my own! Thank you for supporting the brands that help to make this blog possible. This post also contains affiliate links. If you purchase something I recommend, you pay the same price, but I may receive a small commission.
As you may know, we recently embarked on a major garage makeover. When we started planning the project, we had dual the goals of making the garage both prettier and more functional. But thanks to Rust-Oleum® and their RockSolid® Metallic Floor Coating, we were able to jump right past prettier, and instead we now have a garage floor that is down right gorgeous!
START BY COMPLETELY EMPTYING THE GARAGE
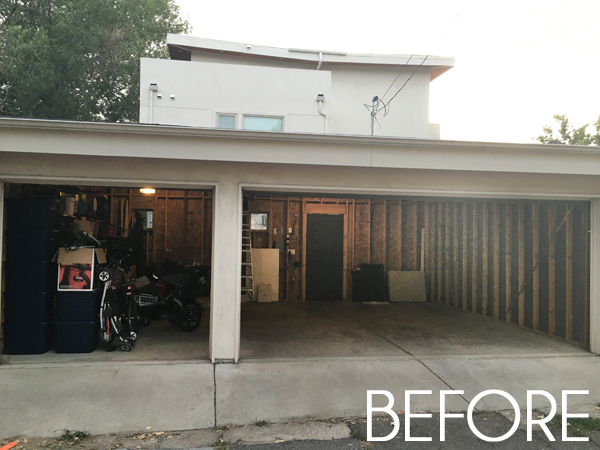
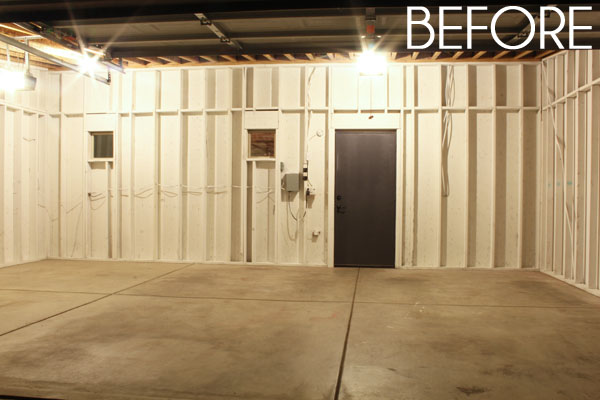
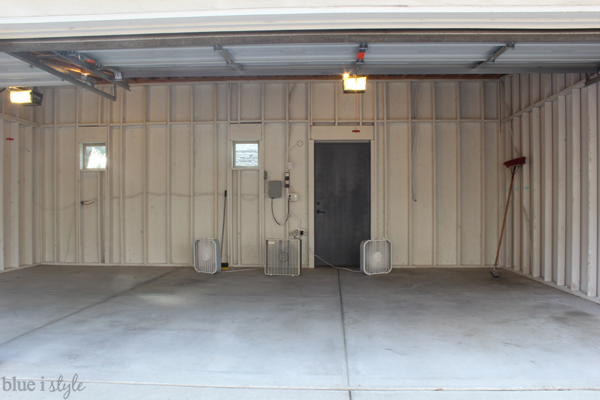
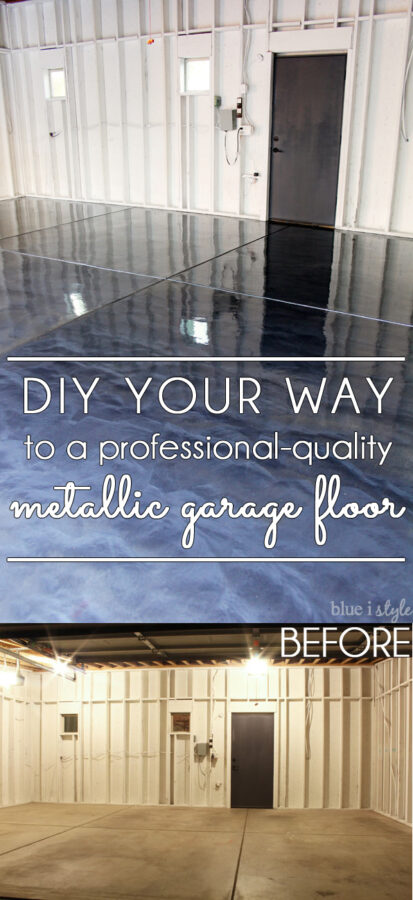
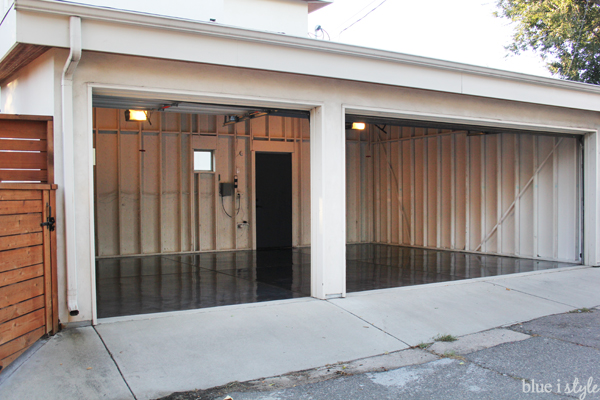
Let’s start at the beginning. Just a few weeks ago, our garage – which is detached from our house and accessed from an alley – was nothing but raw studs, bare concrete, and lots and lots of stuff.
I’ve been admiring the RockSolid® metallic floor options for quite some time, but I couldn’t quite visualize how a fancy floor treatment would look paired with our unfinished walls. We contemplated adding wallboard to the garage, but it didn’t make sense right now for a number of reasons. Instead, we compromised and painted the unfinished walls white. And what a difference it makes – fresh, clean, and bright.
Once we cleared out the garage, we were ready to get started. I reviewed the instructions, watched a few video tutorials {including this video from Rust-Oleum® that was extremely helpful}, and made a supply shopping list.
FREQUENTLY ASKED QUESTIONS ABOUT ROCKSOLID® FLOOR COATING
How Many RockSolid® Floor Coating Kits Do You Need?
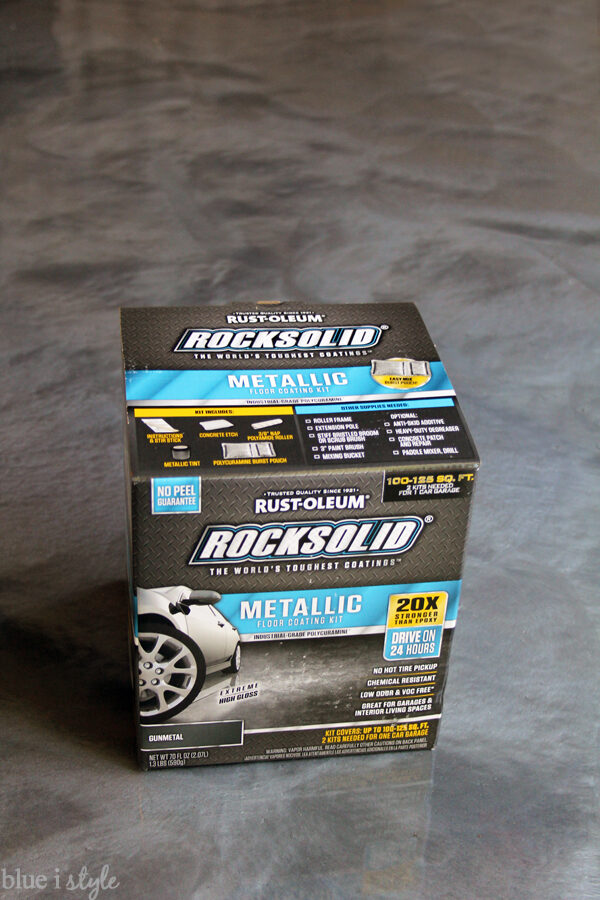
The packaging states that you need 2 kits per single car garage. So for our three car garage, six kits should have been enough. However, I had read a few tutorials that suggested you might need extra, so we had eight on hand to be safe.
Our garage is the smallest possible three car garage possible. There is no extra width on either side of the doors, and very little extra depth beyond the length of our mid-sized SUVs. As a result, I expected that 6 kits might turn out to be enough for us, but we ended up having to open a seventh kit because we ran just a bit short at the end.
In retrospect, we have a few thin spots here and there, and I wish we had applied the coating a bit more liberally rather than trying to stretch it.
I would recommend buying at least one, and preferably two extra kits. There are a lot of time sensitive steps in the process, so it’s better to have extra on hand that you can return if unused rather than coming up short and having to run out to the store in the middle of the project {especially if you are like us, and tend to work at night after the kids are in bed and stores are closed.}
If you decide to apply the optional top coat, those kits each cover a one car garage. I’ll talk more about the top coat below, but the coverage seemed to be accurate – we used three kits for our three car garage.
How Long Does it Take to Apply RockSolid Floor Coating?
Transforming our garage floor from drab to fab was a three step process {though the third step is optional}. As seems to be the case with a lot of DIY projects, the preparation was definitely the most time consuming part. Each subsequent step took us about half the time of the prior.
Be sure to plan this project when you have several days available over the course of about a week – ideally with moderate temperatures and low humidity predicted throughout that time.
RockSolid Floor Coating Time Estimates
More details on these estimates below
Preparation: 6 Hours + 12 Hours Dry Time
Metallic Finish: 3 Hours + 24 Hours Dry Time
Top Coat (optional): 1.5 Hours + 24 Hours Dry Time
One final note before we get to the tutorial… If you have young kids, this would be a perfect time to call in their favorite babysitter, because many of the steps are time sensitive, making it hard to pause for snack and playtime requests {not to mention that you won’t want want tiny footprints in your final product.}
HOW TO PREPARE CONCRETE FOR ROCKSOLID FLOOR COATING
Estimated Time for a Three Car Garage: 6 Hours (starting with bare concrete)
Estimated Dry Time: 12 Hours (at 70 degrees and no humidity)
Before applying the RockSolid® Metallic Floor Coating, we first needed to prepare the concrete floor.
We were fortunate that our floor had never been sealed or painted before, and that it didn’t have any major cracks of divets that needed to be repaired {the instructions cover what to do if you do have these issues}.
For us, the prep just involved cleaning the floor really, really well and etching the concrete to make the floor more porous.
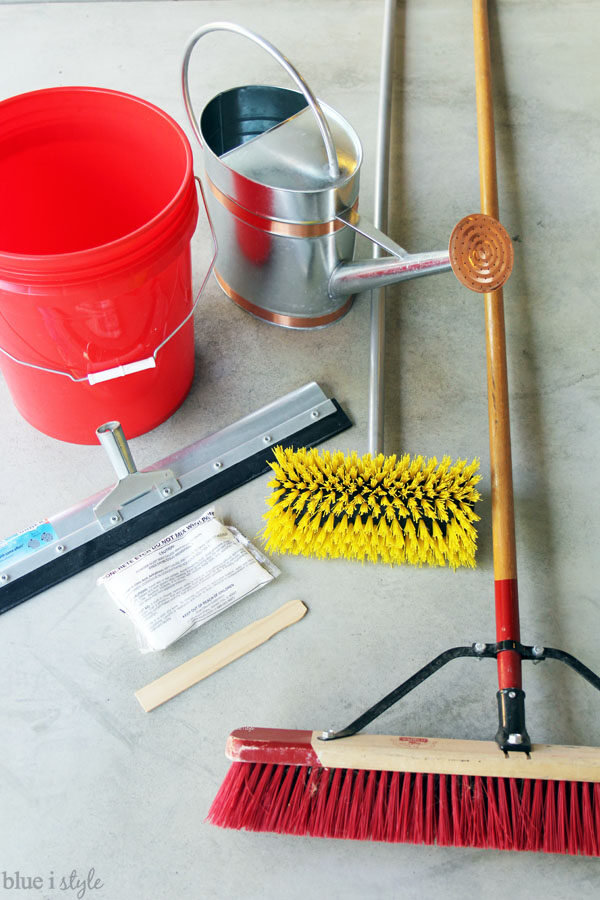
Supplies for Prepping the Concrete Floor
- Broom
- Stiff Bristle Scrubbing Brush
- Large Squeegee
- Bucket
- Watering Can {plastic is recommended; metal was all we could find out of season}
- Hose
- Etching solution {included in RockSolid® Metallic kit}
- Stir stick {included in RockSolid® Metallic kit}
- Scissors
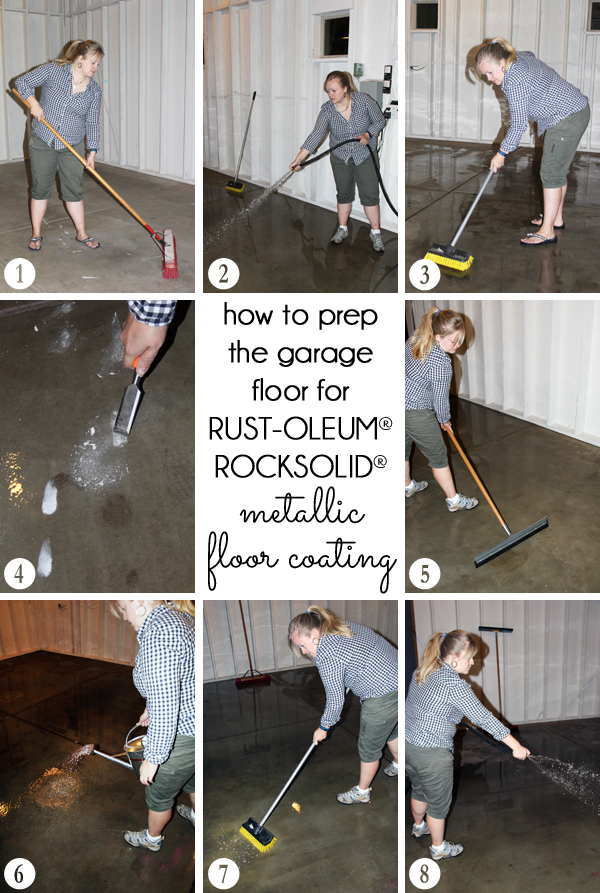
Preparing the garage floor for a RockSolid® metallic finish is a multi-step process, and you’ll wind up repeating some of these steps as necessary.
- Sweep. Clean as much dirt and debris from the floor as possible.
- Spray. Use a hose to spray any excess loose dirt from the floor.
- Scrub. Use a stiff bristled brush to remove any remaining dirt *We were lucky not to have any oil or grease stains on our floor, but if these are present you will need to use a degreaser like Rust-Oleum Cleaner and Degreaser.
- Remove Spray Paint. I’ve tried hard over the years to always put down cardboard or a tarp when I paint in the garage, but we still had a few spots of spray paint here and there. A chisel worked well to remove most of this paint from the wet concrete, and it turned out that the metallic finish covered what we couldn’t remove with no problems.
- Squeegee. Rinse the floor with the hose and remove as much water as possible from the floor with a squeegee.
- Etch. Follow the instructions in the kit for mixing the etching powder with 2 gallons of water; prewet the floor with the hose {squeegeeing away any pooling water}; then use a watering can to distribute the etching solution over a 10’x10′ area of the garage.
- Scrub. Use a stiff bristled brush to scrub vigorously, which should cause the etch solution to foam up a bit. Be sure to keep the entire area wet as you scrub.
- Rinse. As you complete each section, rinse it thoroughly before moving on to etch the next section. When the full garage is complete, rinse again and squeegee.
Let the Floor Dry Completely
Then the waiting begins. The concrete floor needs to be completely dry before you begin applying the RockSolid® metallic coating, or else it may not adhere properly.
We put three box fans in the garage to help speed the drying process, and after about 12 hours we were confident that it was dry enough. However, we live in Denver where there is virtually no humidity, and the temperatures were very moderate that weekend – in other climates or conditions, the dry time might take longer.
Follow the instructions to ensure the floor is dry enough. Also, rub your finger across the dry floor to ensure that no dust or powder comes up. If you can see powder on your fingers, you will need to repeat the rinsing and scrubbing process to remove any traces of etching powder, and then allow the floor to dry again. We were fortunate not to have to repeat the scrubbing and rinsing.
HOW TO APPLY ROCKSOLID METALLIC FLOOR COATING
Estimated Time for a Three Car Garage: 3 Hours
Estimated Dry Time: 24 to walk on (at 70 degrees and no humidity)
With the floor dry as bone, we were ready to get down to business and start putting the metallic finish on the floor.
This was the part of the process that had me really nervous. I’ve seen so many gorgeous photos of the RockSolid® metallic finish, and I worried we wouldn’t be able to achieve the same look.
But now that I’m on the other side, let me assure you, this is actually really easy!
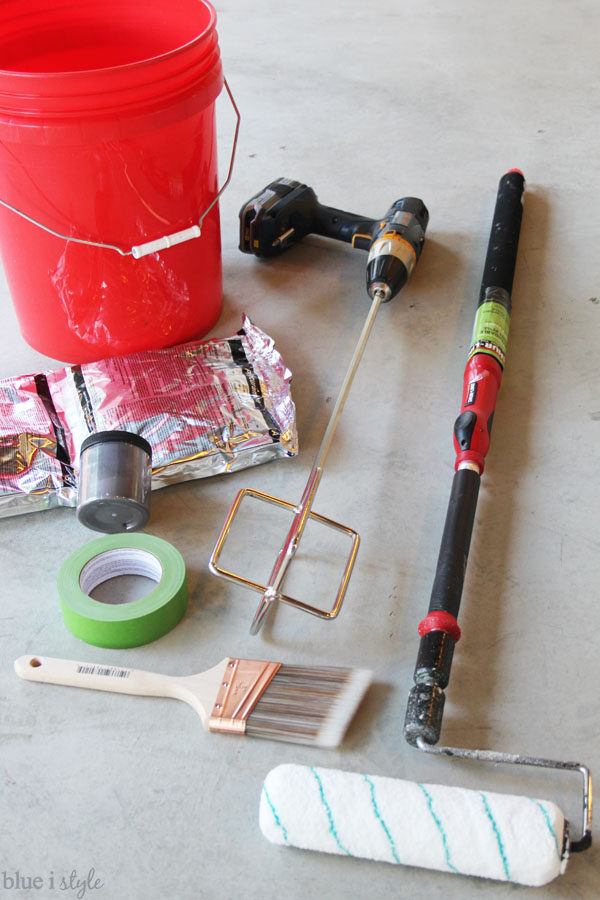
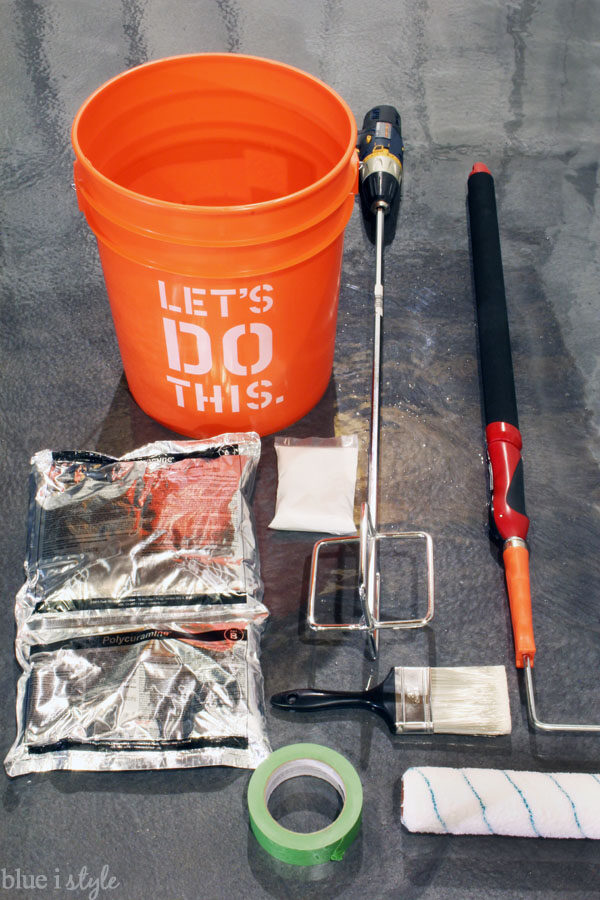
RockSolid Floor Finish Application Supplies
- Bucket
- Polycuramine® Pouch {included in RockSolid® Metallic kit}
- Metallic Tint {included in RockSolid® Metallic kit}
- Drill with Paddle Mixer Attachment
- Roller Frame and Extension Pole
- 3/8″ Nap Roller {included in RockSolid® Metallic kit}
- Paint brush {good quality, synthetic}
- Painter’s Tape {optional}
- Scissors
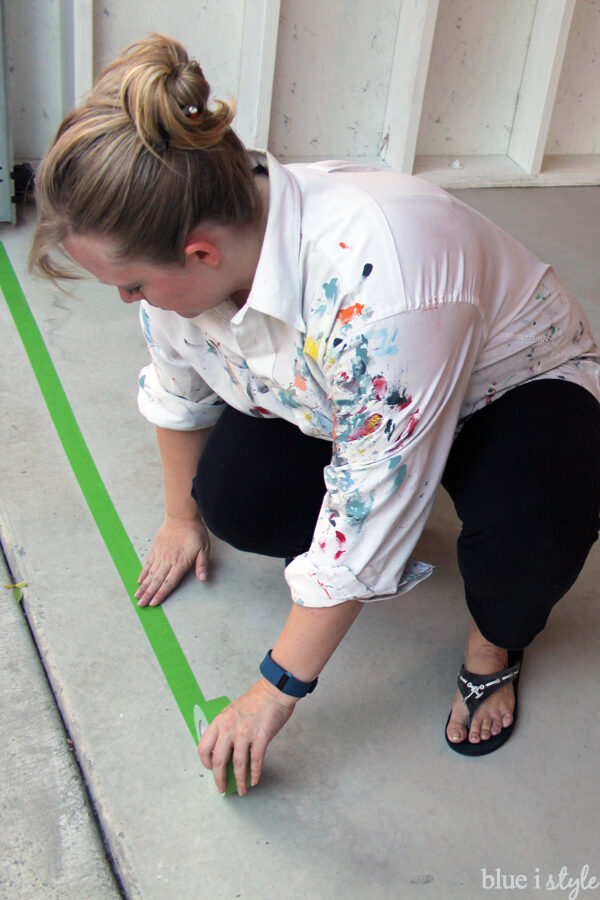
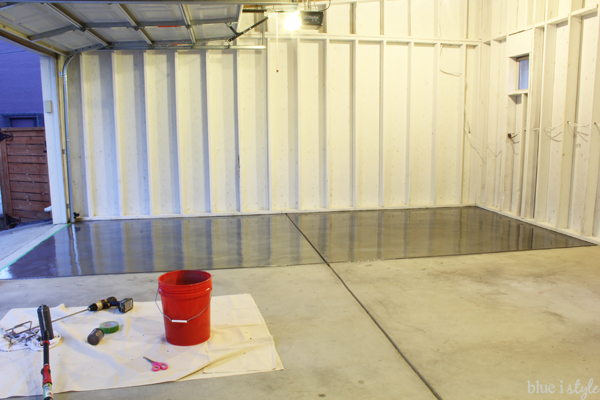
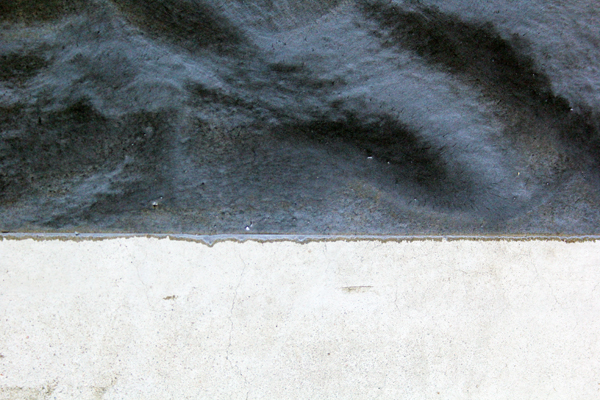
Our cement garage floor extends a few inches beyond the garage doors. Since the RockSolid® metallic floor coating is really only intended for indoor applications, we ended up deciding to tape off the line where the garage door closes rather than also painting the small section that will be outdoors exposed to the elements. I plan to cover this line with a vinyl threshold seal.
We were finally ready to mix the metallic finish
It’s important to note that once the ingredients are activated, they must be used within 45 minutes to one hour {depending on the temperature}, so you’ll only want to mix one kit worth of floor finish at a time, mixing more only when you are ready for it.
How to Mix the RockSolid Floor Finish
MIX THE CONTENTS IN THE POUCH. Begin by shaking the pouch and squeezing each individual side to mix the material. Then lay the pouch down on the ground and roll from the Part A to the Part B side, the pressure of which will cause the middle seal to burst and allow two parts to be combined, thereby activating the contents. Continue shaking and squeezing the pouch for another 2-3 minutes.
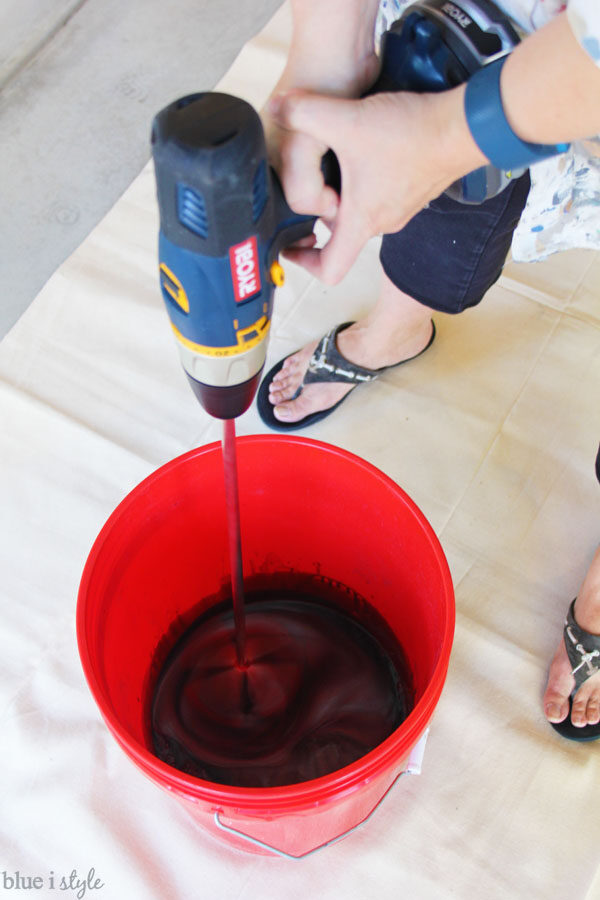
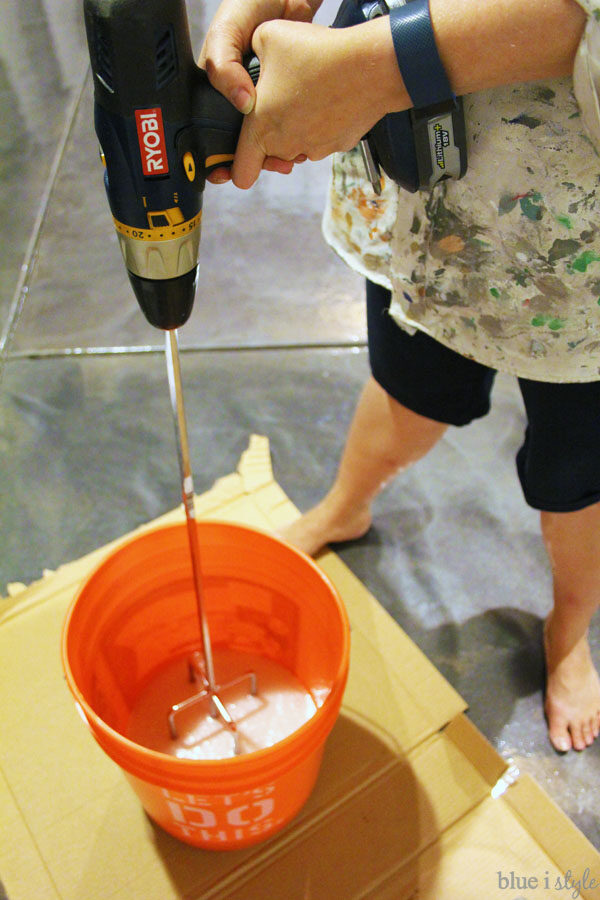
POUR & MIX. Once thoroughly combined, cut the corner off of the pouch and pour it into a bucket. Add the metallic tint and use the paddle mixer to mix the Polycuramine® and the metallic tint for 3 to 5 minutes.
How to Apply RockSolid Metallic Floor Finish
Once the floor coating is mixed, you’ll want to start applying it right away, since you have a limited window of time to work with. You’ll want to work in 5’x5′ sections, but before you start painting the floor, make sure you have a plan so that you don’t paint yourself into a corner!
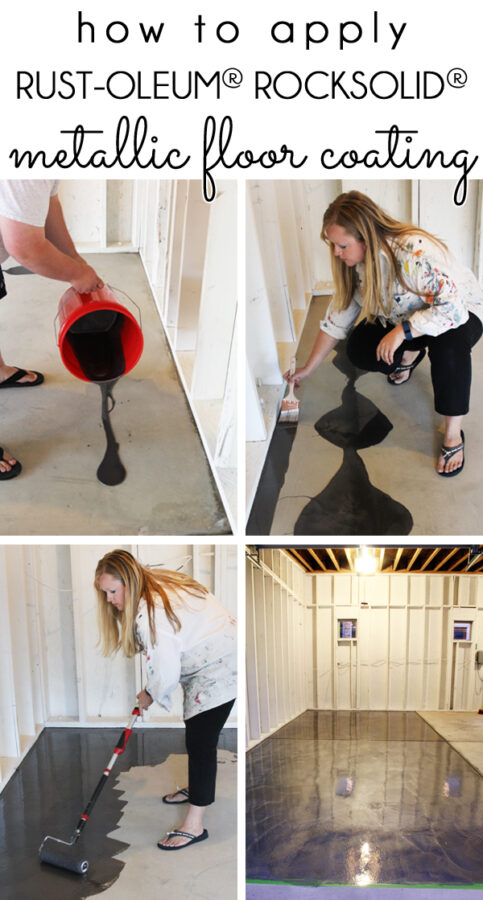
START BY POURING PAINT ON THE FLOOR. Start by pouring out a thin, 5 foot long line of the paint directly onto the floor about a foot away from the wall. As you’ll see in the photos below – we had some challenges with pouring out a “thin” line. We got better as we went along, but we were able to make it all work just fine, so don’t stress about it too much!
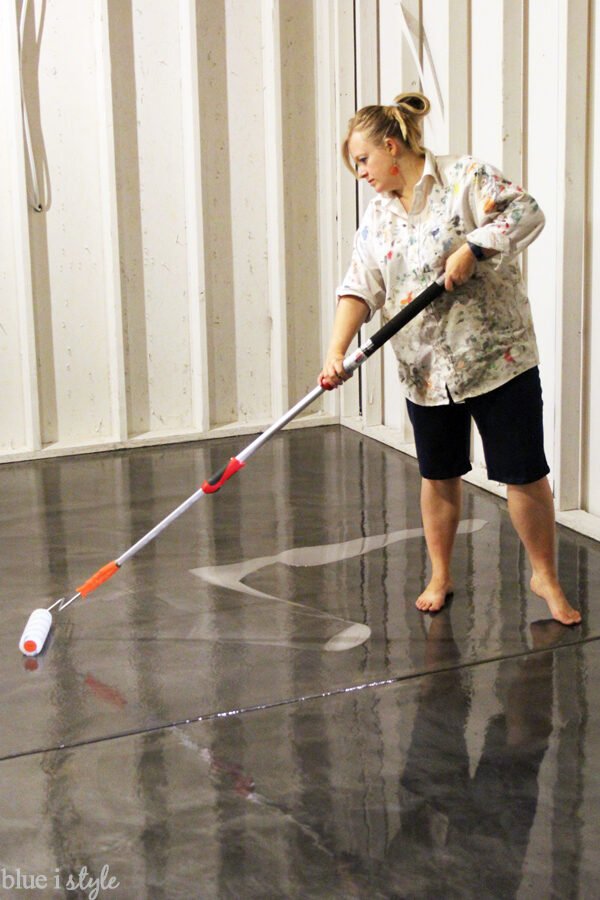
EDGE AND THEN ROLL. Dip your paint brush in the paint that you poured out on the floor and begin edging along the wall(s) in your first 5’x5′ section. Once you have edged, you’ll move on to rolling {make sure to delint the roller first so that you don’t leave any fuzz in the floor finish}. First roll in the shape of Ms and Ws – pulling the paint back as far as you can before rolling forward toward the wall {this prevents you from creating thick puddles by the wall}.
NEXT, CREATE CIRCULAR PATTERNS. Once you’ve covered an area, you’ll then use the roller to create circular patters in the paint. Moving the roller in a swirling motion feels really awkward at first, but it gets easier as you go. It will also work muscles you didn’t know you had! This method helps to get a nice even coverage and avoid thin spots, and also gives the floor its showroom look.
EASIER WITH TWO PEOPLE. This is ideally a two person job, though you could do it alone. Scott and I worked together and found a good rhythm. He poured out the lines and helped me edge, then I did the rolling. After Scott poured the last of the metallic finish from each batch, I would finish rolling while he began mixing the next batch.
Let the RockSolid Finish Dry
The instructions suggest that the floor coating will be dry enough to walk on in 8-10 hours, but I wanted to be extra cautious {I wasn’t about to mess up all that shiny gorgeousness}, so we waiting about 24 hours before returning to the garage to walk on it for the first time. I first touched my finger lightly to the floor near the doorway to ensure that it didn’t feel tacky at all.
Admire the Metallic Floor Finish
It wasn’t until I finally walked across the floor that I was finally able to appreciate our new Gunmetal metallic floor for all of its beauty. I feel like we either need a show car to park in here, or we need to host one heck of a dance party!
How Durable is RockSolid Metallic Floor Finish?
With all this talk about how pretty it is, I don’t want to ignore the function. After all, the garage needs to be a really hard working space!
This RockSolid® Metallic Floor Coating should be super durable. Its Polycuramine® formula is said to be 20 times stronger than a standard garage epoxy floor coating, and it can stand up to harsh chemicals, including salt, oil, and gas.
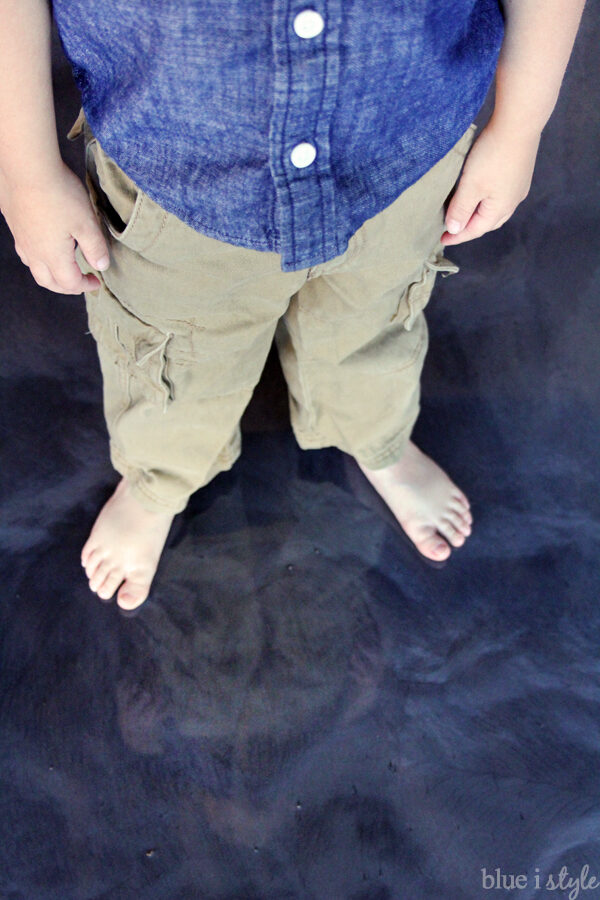
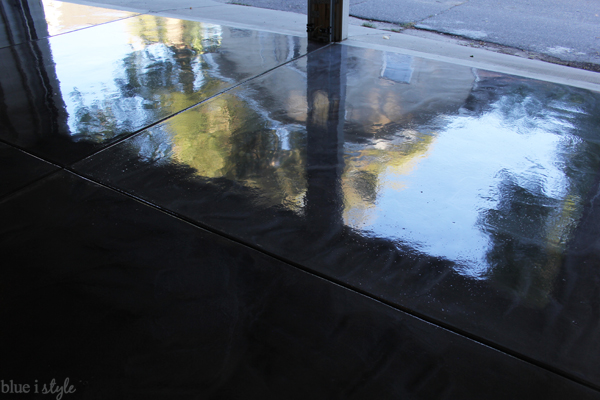
My four year old was in awe of the floor as well, and thought it was so cool that he could see his own reflection!
Is the RockSolid Metallic Floor Slippery?
The only concern I had was whether this high gloss finish would make the floor extra slippery. Since the owner of those cute toes will be running around in the garage, he and his younger brother’s safety are my number one concern.
I had read about RockSolid® has an optional clear top coat that you can apply to the car, and a anti-slip material {with a texture similar to fine sand} that you can add to the top coat. The floor was soooo pretty {have I mentioned that yet?!}, so I really worried about how the anti-slip additive would change the look of it.
But at the end of the day, my number one concern was the safety of the boy with the cute toes, and the safety of his little brother. Living in Colorado, during the winter we often pull into our garage with snow on our car that will then melt off as it sits in the garage, causing the floor to be wet.
To test it out, I poured a small puddle of water on the floor and walked around in it barefoot and in several different pair of shoes. My very unscientific test concluded that the metallic floor coating didn’t seem to be any more slippery than our smooth, bare concrete floor when wet.
OPTIONAL STEP:
HOW TO APPLY ROCKSOLID TOP COAT WITH ANTI-SLIP ADDITIVE
Estimated Labor Time for a Three Car Garage: 1.5 Hours
Estimated Dry Time: 24 to walk on (at 70 degrees and no humidity)
If I could have, I would’ve liked to live with the floor for a few months before deciding whether to add the anti-slip top coat, but the top coat must be applied within 7 days of the metallic finish being put down. Otherwise, you have to sand the entire floor before applying the top coat. That not only sounds like way to much work, the idea of sanding the gorgeous floor made me feel twitchy.
At the end of the day, I decided that if there was something I could do that might make the floor safer for my family, I had to do it. So a few days after finishing the metallic finish, we were back out in the garage, ready to get to work again.
The instructions that come with in the Top Coat Kit are very confusing, but I’ve got the instructions here that you need.
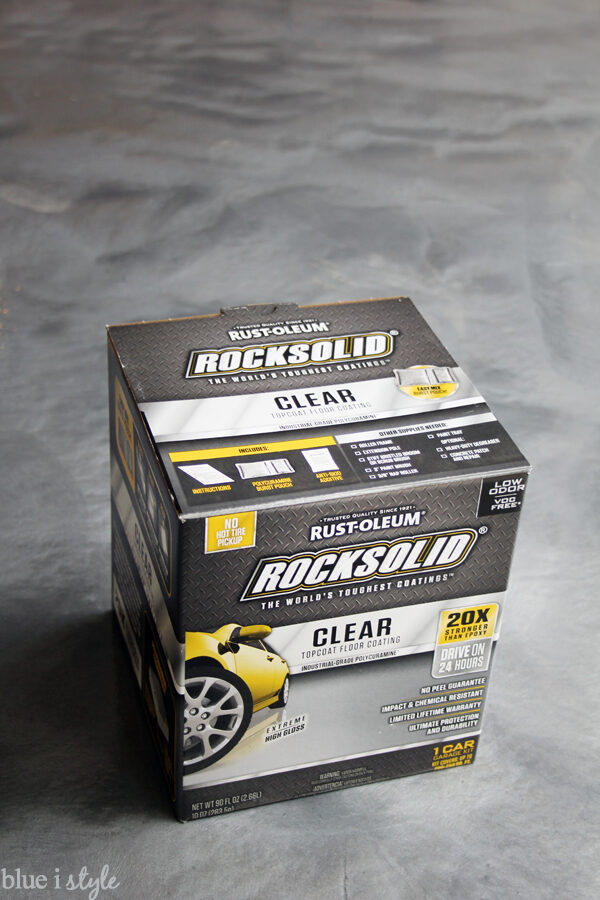
The top coat box says that the kit contains a package of the clear top coat and package of anti-slip additive. However, the instructions inside the box say that the box also contains etching powder, which made me question whether the unlabled white gritty material was actually anti-slip additive or etching powder.
Top coat instructions talked about pouring the clear coat directly from the pouch onto the floor, with no directions for mixing in the anti-slip additive.
Fortunately, I still had one extra metallic kit in the house, so I was able to open that box and compare the appearance of the etch powder to the white material in top coat box. It was immediately clear that they were not the same, so I could rest easy that the unlabled white powder in the top coat kit was, in fact, the anti-slip additive.
RockSolid Anti-Slip Top Coat Supplies
- Bucket
- Clear Top Coat Pouch {included in RockSolid® Top Coat kit}
- Anti-Slip Additive {included in RockSolid® Top Coat kit}
- Drill with Paddle Mixer Attachment
- Roller Frame and Extension Pole
- 3/8″ Nap Roller
- Paint brush {good quality, synthetic}
- Painter’s Tape {optional}
- Scissors
How to Mix in the RockSolid Anti-Slip Material
I had done a lot of research about the top coat with the anti-slip, and time and again I read that it was it could be added, but I couldn’t find any tutorials where any explained the process.
Since the instructions didn’t talk about how to add the anti-slip material, we decided to just use the same process that we used for mixing in the metallic tint in the prior step – the paddle mixer. This seemed like the best way to ensure that the additive was mixed evenly throughout the top coat {just be sure not to over-mix or you can add to much air into the product}.
How to Apply RockSolid Anti-Slip Top Coat
Just like the metallic coat, once the ingredients are activated, they must be used within 45 minutes to one hour {depending on the temperature}, so you’ll only want to mix one kit worth of floor finish at a time, mixing more only when you are ready for it.
Once we were ready to put the top coat down on the floor, the instructions said to follow the same process as the metallic finish – pour out thin ribbons, edge with a brush, and then roll backward and then forward, in M and W patters to evenly spread the finish. The only difference is that this time, we didn’t need to do the swirling wax on-wax off pattern – which made the application much faster – about twice as fast!
Let the RockSolid Top Coat Dry
We were once again conservative, and waited a full 24 hours before attempting to walk on the floor, but check out the new view! That is quite a transformation from the wood studs and dirty concrete of the week before!
Does the RockSolid Top Coat Change the Look of the Metallic Finish?
As I mentioned, I has really worried about how much the anti-slip top coat would change the look of the floor. I’ll be honest… it didn’t! From some angles you can see just a bit more texture in the floor, but overall the floor looks just the same… stunning!
Benefits of the RockSolid Metallic Top Coat
I should also mention that, even if you decide you don’t want/need the anti-slip finish, the clear top coat alone has some benefits that are worth considering. This clear coat is said to make the floor more durable and provides a protective layer that prevents the metallic finish itself from getting scratched. From what I’ve read, if, down the road, the floor starts looking scratched or dull, you can sand the top coat and apply a new clear finish to make the floor look like new again.
Even with the anti-slip material added to the top coat, the metallic floor still produces reflections for days! And even thought we picked the dark, gunmetal color, the floor bounces around the the light, helping the garage to feel brighter than ever!
I mean, seriously!!!
After spending 6 hours cleaning the garage floor to prep it for this finish, I realized just how much dust and dirt comes in the garage. To help keep the fancy new floor cleaner, and to cover up the line where the metallic finish meets the raw concrete, we plan to affix a vinyl threshold barrier for each garage door.
Now I just hope that the rest of my garage makeover plans can live up to this floor! The goal is to turn this space into our “DIY Retreat.” We will park our two cars on the double door side of the garage, but that third bay will be dedicated to storage and workshop. We’ll be installing new shelves and drawers on the side wall, and we are now the proud owners of two gorgeous new work benches that we bought at Home Depot {one stationary and one mobile}.
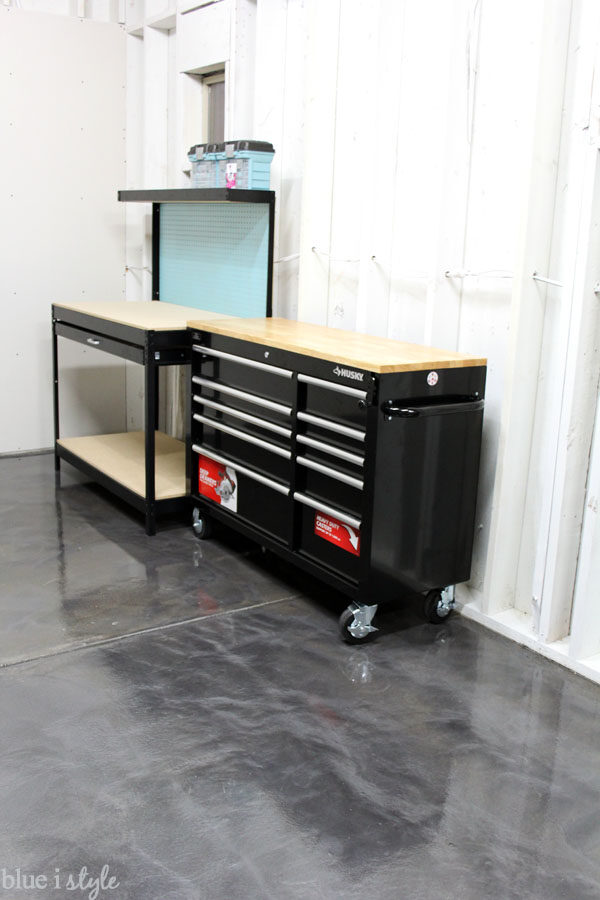
Yay for style and function! Not only do these new workbenches provide a ton of new storage, the Husky workbench on the right is on casters and can be rolled out the middle of the garage, which will make it much easier when we are trying to cut long boards or maneuver large projects. Plus the top of the rolling workbench is adjustable.
UPDATE: I’m so excited to show you how the garage turned out once we got everything back into the space and organized! Be sure to check out the full garage makeover reveal post for all the pretty details and my best garage organizing tips for the functional side of the story!
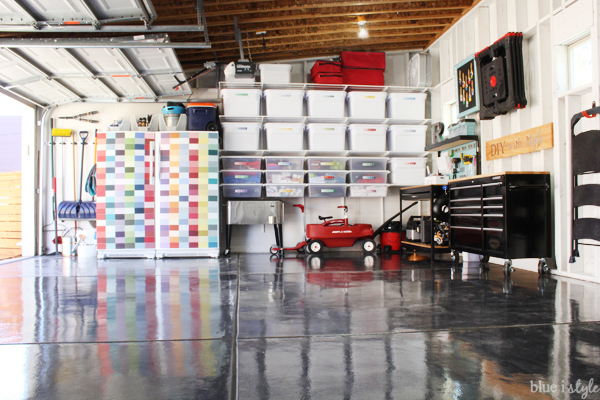
And don’t forget to pin the image below so that you can find you way back to this tutorial when you’re ready to give your garage floor {or any other concrete floor} a shiny and pretty new look!
